
[Easy! Sewing Basics] How to Make a Knot - Tips for Starting and Ending Your Sewing
- Date created:
- Update date:

Knotting and securing stitches are essential when hand-sewing. Surprisingly, many people find them difficult. Once you've mastered the basics and learned the tricks to a neat finish, you'll have nothing to fear! Let's master them now!
Couturier kits allow you to learn the basics of sewing, such as knotting, securing stitches, and running stitches, using a lesson cloth. They are also recommended for those who have been sewing somewhat haphazardly on their own and want to review the fundamentals.
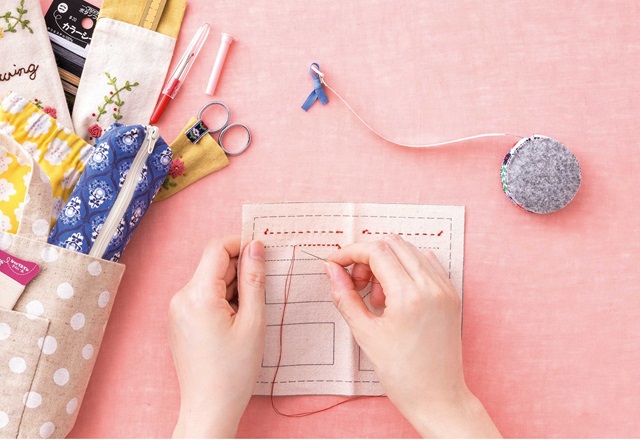

table of contents
◇ How to tie a knot
Making a knot using only your fingers
We'll show you two methods: one using only your fingers and another using a needle. Using only your fingers is easy, but using a needle allows you to create a consistent size without making mistakes.
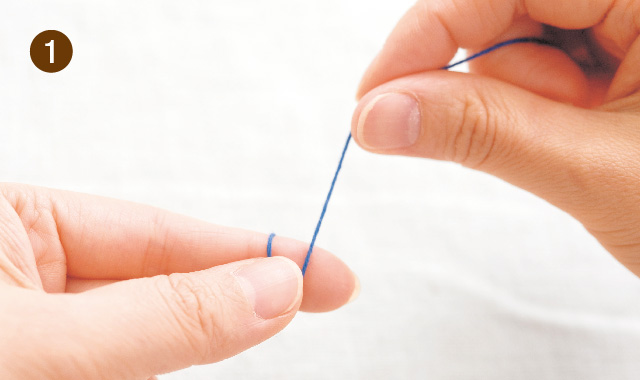
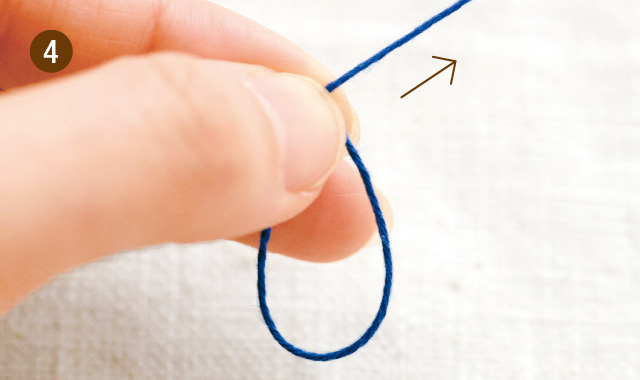
Wrap the thread once around the tip of your index finger. (You can use either your right or left hand!)
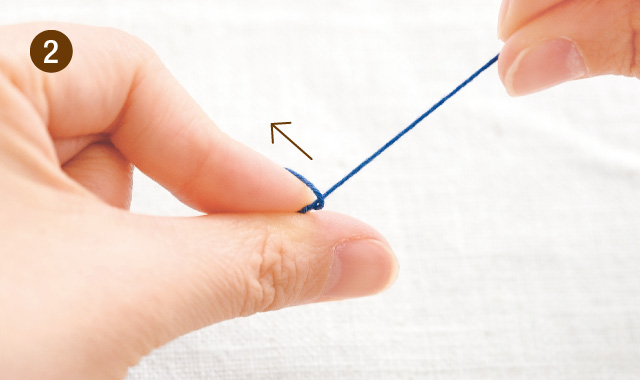
Hold your thumb down and pull out your index finger as if twisting the thread.
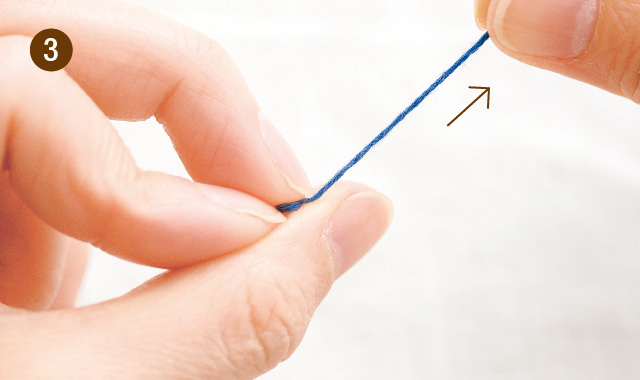
While holding the top of the loop you've created with your middle finger, pull the thread.
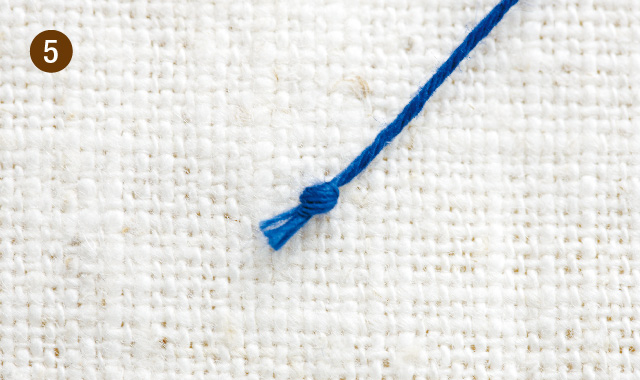
The knot is now complete.
- Making a knot with a needle
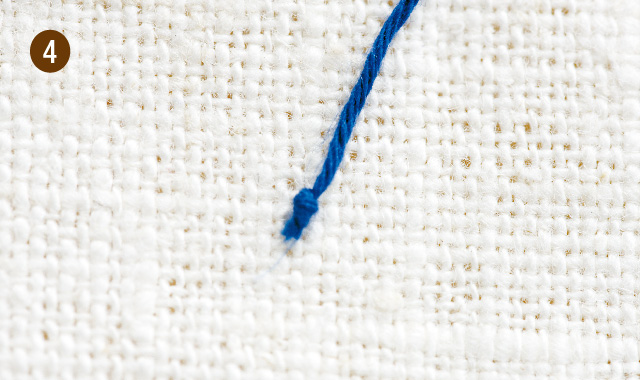
Thread the needle through its eye, place the end of the thread on your index finger, and secure it by pressing down with the needle.
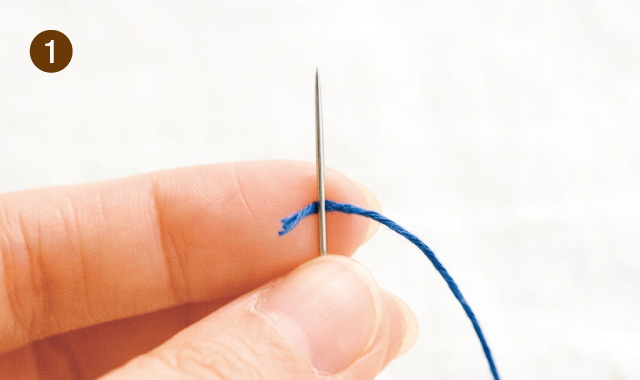
Wrap the thread around the needle two or three times.
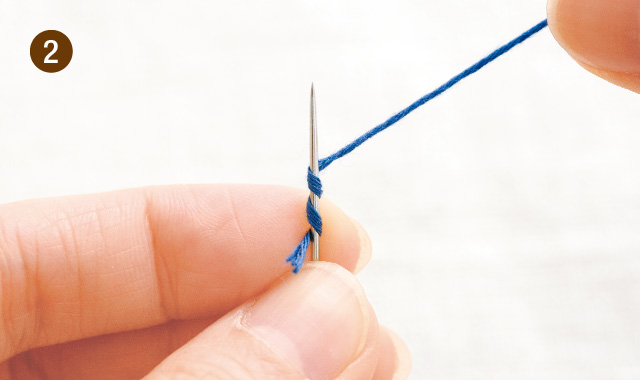
While holding down the wrapped portion, pull out the needle.
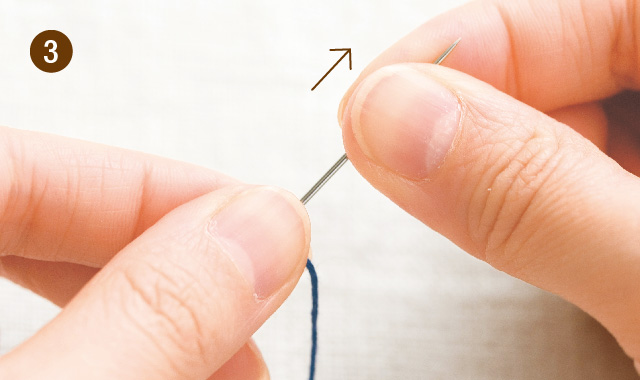
Hold it firmly and tighten the thread until the very end.
The knot is now complete.
◇ How to tie a knot
Once you learn the trick to making a knot at the end of sewing, you'll be able to tie it securely and firmly.
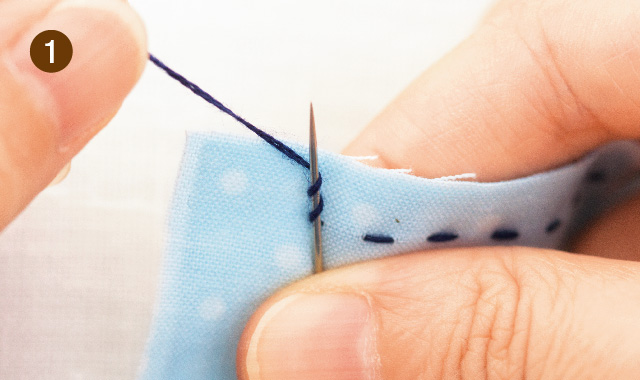
Place the needle at the end of the stitching and wrap the thread around it two or three times.
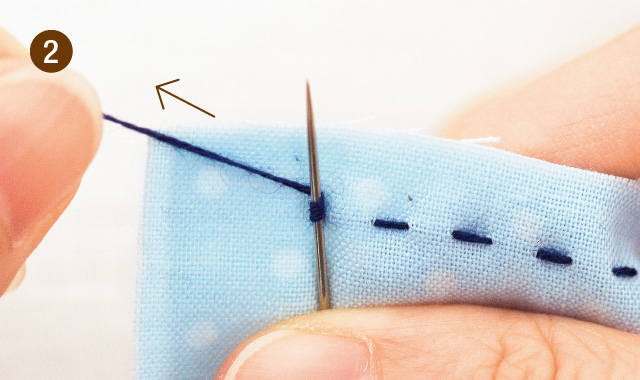
Pull the thread and secure it just before the end of the stitching.
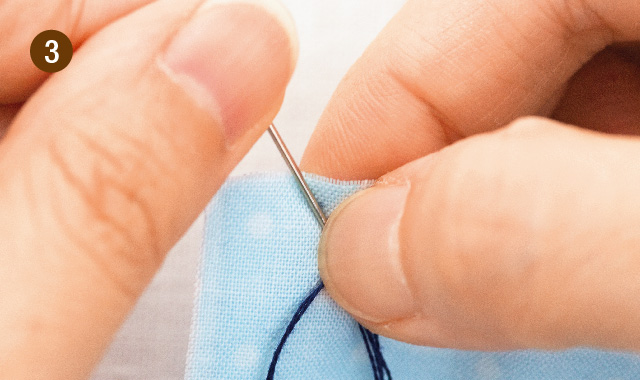
To prevent the wound thread from shifting, hold it in place with your thumbnail and pull the needle out.
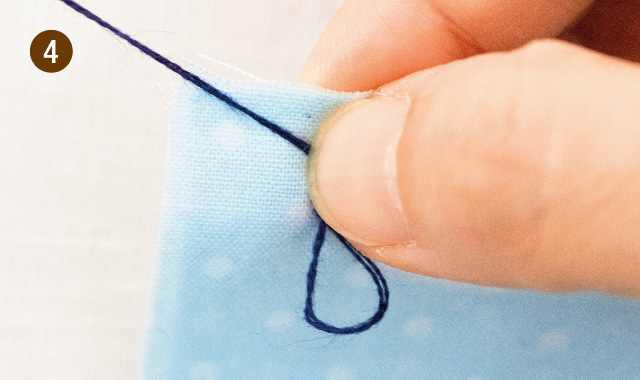
Keep the knot securely in place until you have completely pulled the thread.
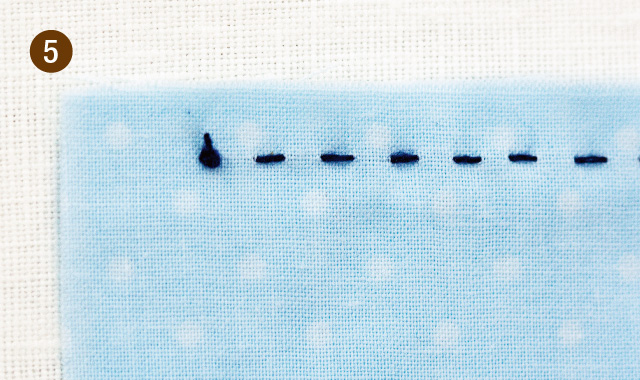
Cut the thread, and you've made a knot.
◇Tips for neatly tying knots and securing knots
The basic rule for starting a seam is to insert the needle in an inconspicuous place, such as the wrong side of the fabric or a seam allowance that is not visible from the right side. The same applies to the end of the seam, but sometimes there is no place to hide it, so remember the tricks to "hide" or "make the knot less noticeable."
When attaching buttons
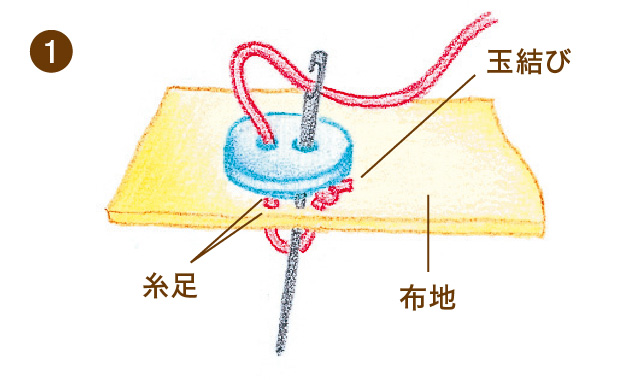
Insert the needle from the front and attach the button.
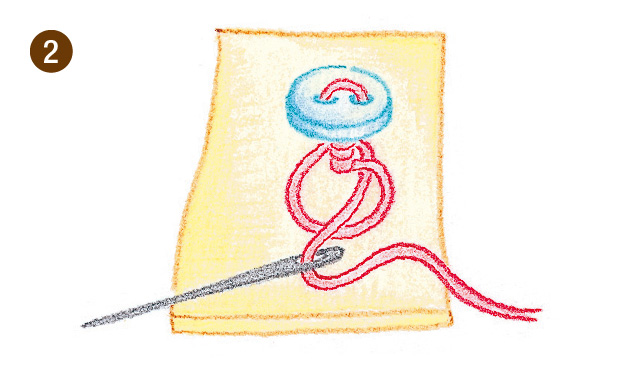
After attaching the button, tie a knot once at the base of the button.
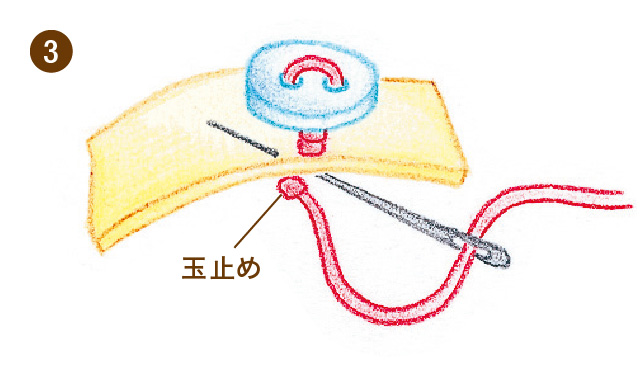
Tie a knot on the back of the fabric, bring the needle to the front, and cut the thread.
- When using a blind stitch (for example, when hemming)
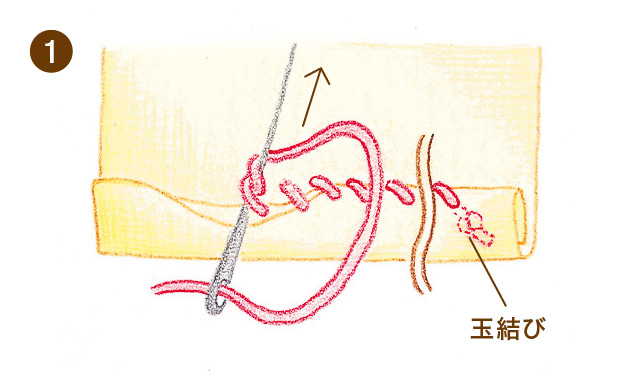
Bring the needle out from inside the seam allowance so that the knot is hidden, and begin stitching.
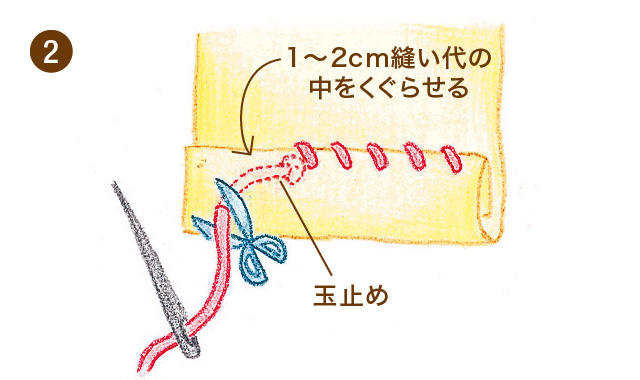
To finish the stitching, tie a knot on the back of the seam allowance so that the knot is not visible. Then, pass the needle through the seam allowance about 1-2 cm and cut the thread.
- When attaching the facial features to a stuffed animal
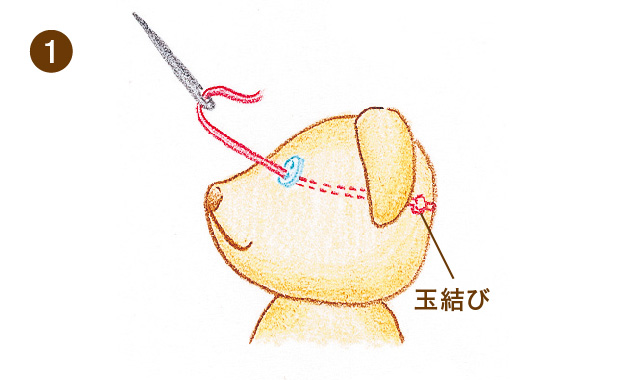
When attaching eyes to a stuffed animal, insert the needle from the back of the head. Pull the thread tightly and hide the knot inside the head.
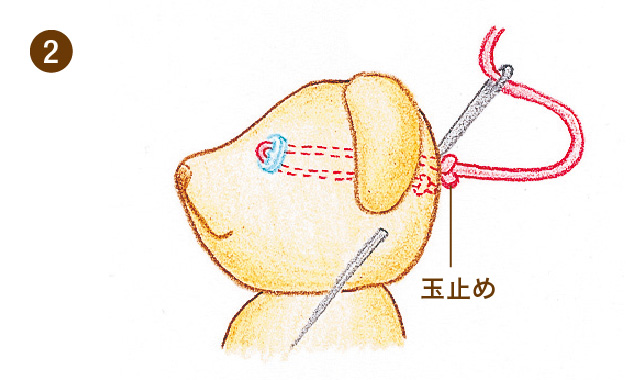
To finish sewing, tie a knot behind the head, then return the needle to the same eye, bring it out from a slightly different spot, and pull the thread tightly to tuck the knot inside.
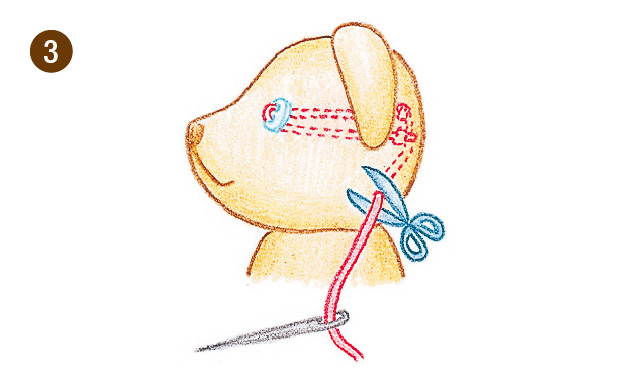
Cut the thread and you're done.
When quilting
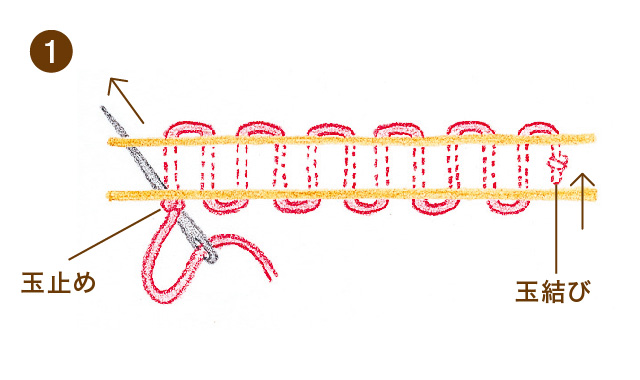
Similar to making stuffed animals, to make a knot, pull the thread tightly and tuck it into the quilt, and to make a stopper knot, insert the needle into the same eye and pull it through.
Cut the thread and you're done.
U-shaped binding
The same method can be used when stitching back openings or other areas with a U-shaped stitch.
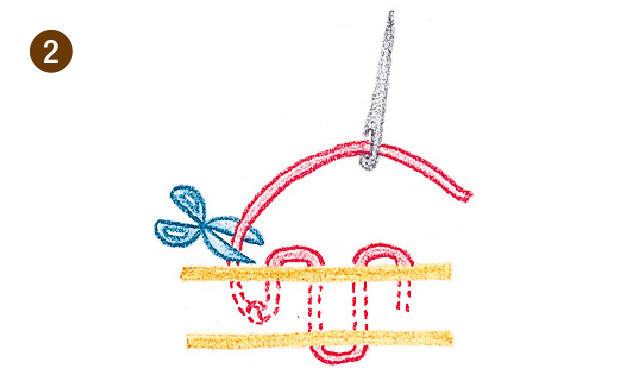
For the last stitch, sew with a small stitch and tie off the knot.
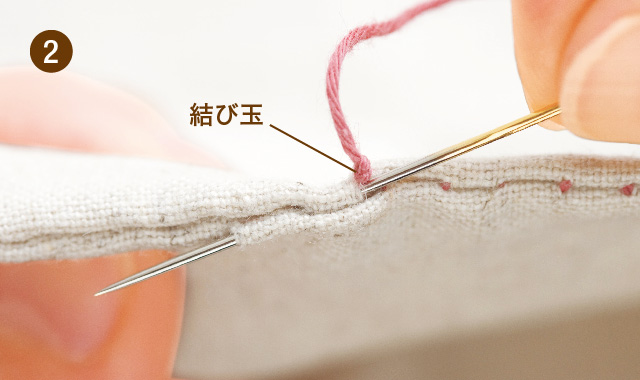
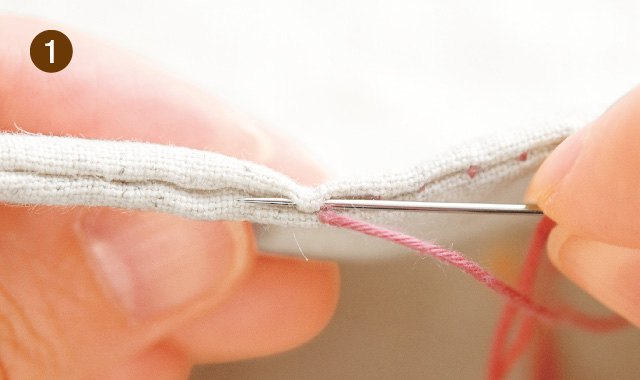
Pull the knot through the eye of the needle.
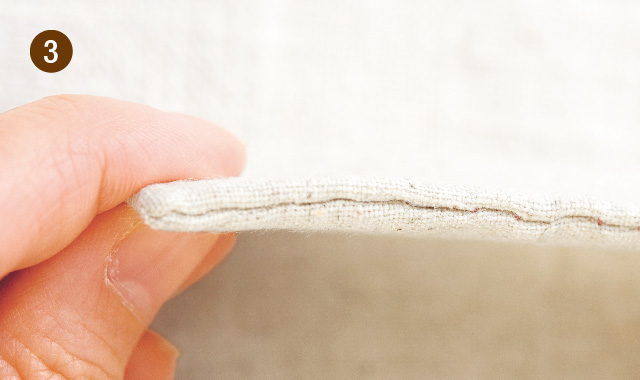
Cutting the thread close to the edge of the fabric will give you a neat finish.
More simply...
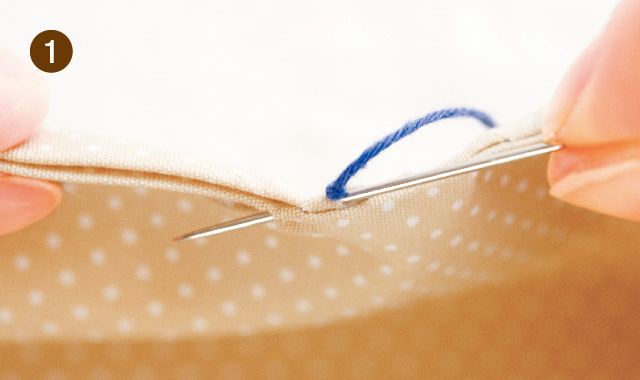
Insert the needle right next to the knot and bring it out a little further away.
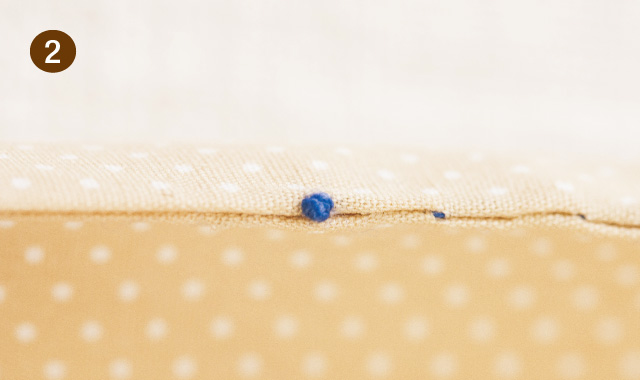
If you cut the thread this way, the end of the thread won't be noticeable, even without pulling the knot through the needle's eye.
◇Tips for preventing seams from unraveling
For example, when using a loosely woven fabric, have you ever had the knot come undone if you pulled the thread too hard? Making a knot is important, but backstitching will ensure a secure start to your stitching. Also, backstitching at the end of your stitching will keep the thread firmly in place even if you don't make a perfect knot, so you can rest assured.
- Starting to sew
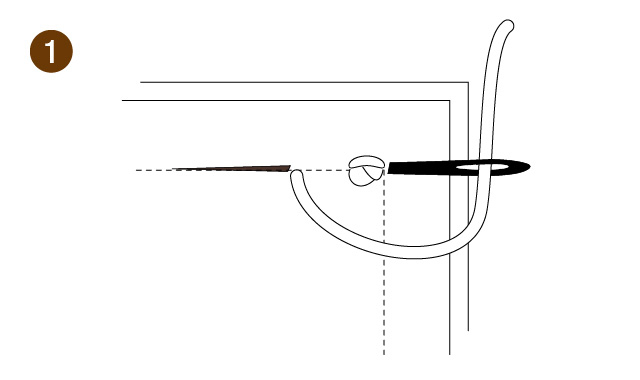
Sew one stitch, return the needle to the beginning, and sew another stitch in the same spot.
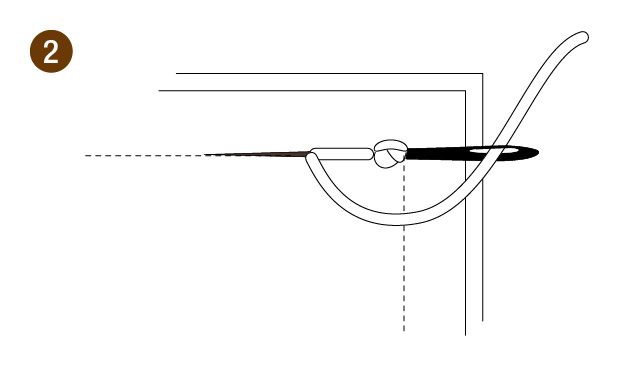
Sew the same spot again. (This means you've stitched it back two times.)
Finished sewing
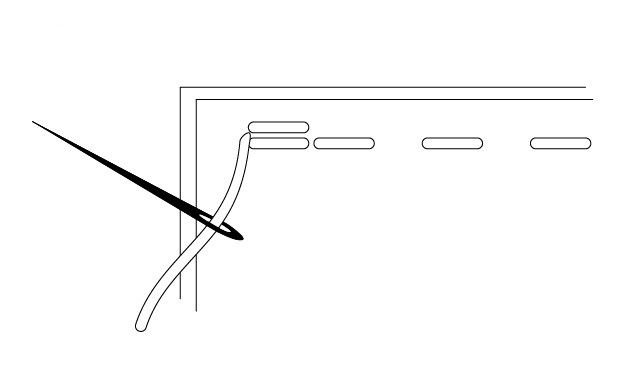
Just like at the beginning of the seam, make two backstitches at the end of the seam.
・Thread stopper
This is one way to finish off the thread at the end of sewing. When making stuffed animals, you can use this method to secure the thread when you're pulling the opening tightly to make it look secure, such as when you're not sure if a simple knot is enough.
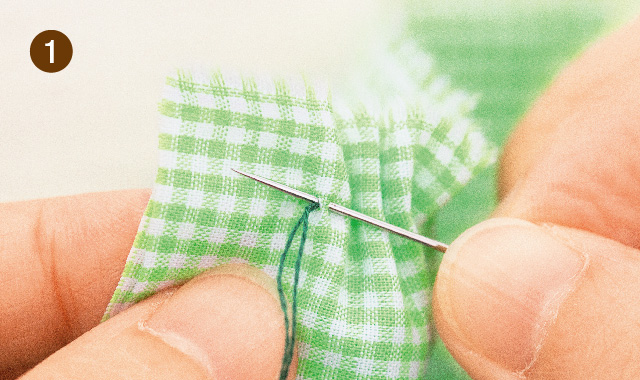
Pick up a small amount of fabric with the needle.
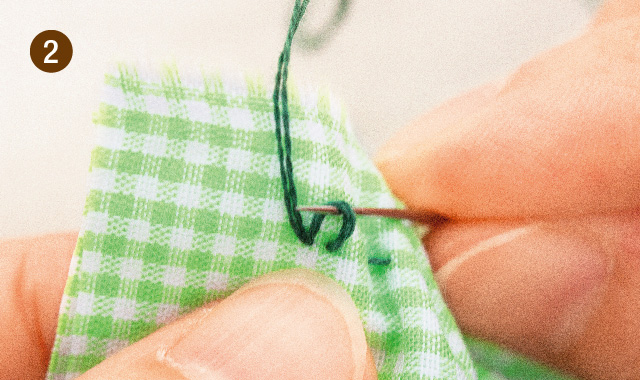
Pull the thread and pass the needle through the loop that forms.

Tightening the thread will secure the end of the stitching firmly. It's also a good idea to tie a knot at the end.
The beginning and end of a seam are crucial for proper finishing!
Finishing the beginning and end of your stitches is crucial to prevent fraying. Mastering this technique will bring you one step closer to professional skill!
The Couturier blog also features lots of other helpful information, from basic sewing procedures to more elaborate embroidery techniques. Be sure to check it out! Don't miss the Couturier shop, which sells DIY kits, and our official social media accounts!
▽Click here for a list of sewing and tailoring articles.
▽Click here for a list of sewing and sewing products.
▽Click here for the Couturier Shop
The products featured in this article are listed here.

A Beginner's Guide to Sewing: A Study Group
For those of you who have been doing things your own way until now, why not take this opportunity to properly learn sewing? With this kit, you'll start with basic stitches, learn how to attach buttons and zippers, simple embroidery, and how to make bags, and by the end you'll be able to make a bag. You start with easy projects, so your skills will improve gradually and surely. The fact that you can review what you've learned and make a cute accessory every month is another reason why this kit is so popular.
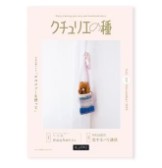
"Couturier Club" registration fee (annual registration)
Join the "Couturier Club" and enjoy tons of great member benefits for just 100 yen a month! Enjoy introductory prices on your first purchase, and our monthly newsletter, "Couturier's Seeds," is packed with fun and useful information, including seasonal crafting ideas, original works by artists, and crafting techniques. We look forward to you joining the "Couturier Club" and enjoying crafting together!

"The Basics for Beginners": A First Aid Kit for Everyday Sewing - Needlework Lessons
Solve your "problems" yourself! A needlework lesson that's like a first-aid kit for everyday use. "The hem of my skirt is coming undone, how do I sew it?" "The handle of my eco-bag is falling apart, can I do something about it?" "A button is about to fall off, what should I do?" This lesson is designed to solve those everyday needlework problems! You'll learn the correct way to do basic sewing and button attachment, as well as ideas for easy and time-saving tasks. We'll also provide you with essential sewing tools and handy items that you can use right away.
SHARE


Related article
Handmade tissue box cover / Yukinko's carefree and easygoing handmade life
Sewing
Handmade Octopus Measuring Tape Cover / Yukinko's Carefree and Easygoing Handmade Life
Sewing

The View Seen Through Patch-Work-Life ~The Future~
Sewing
Patchwork Techniques: How to Use Paper Liners
patchwork
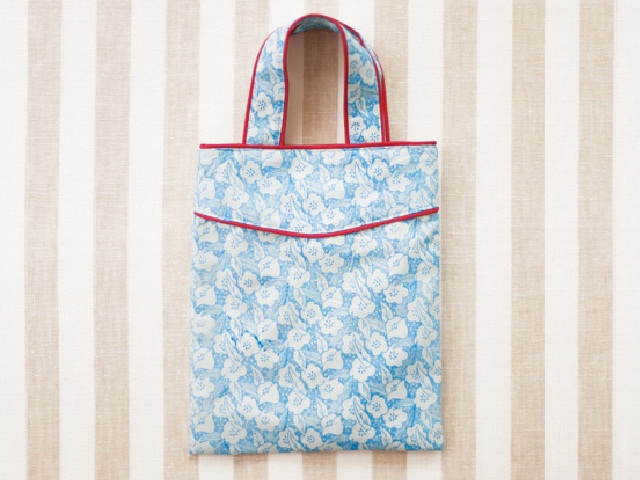
What is piping tape? Explanation of types, basic application methods, and how to make it.
Sewing
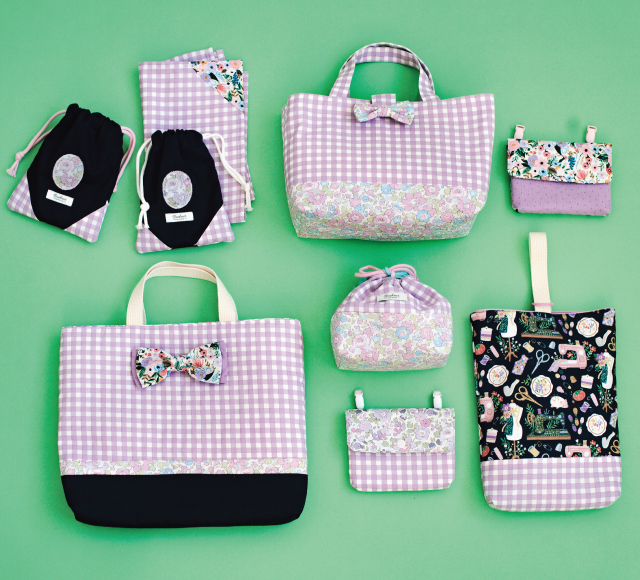
Continued: K-chan's Middle School Set / Yukinko's Free-Spirited and Easygoing Handmade Life
クチュリエの種
Articles I recently read

If you feel like doing some handicrafts (handmade crafts),
To the Couturier Shop

Shopping
Once you get hooked, you'll be completely engrossed!
These kits are long-selling and popular items at Couturier. From knitting and joining pieces to creating and wearing them, and enjoying various arrangements, there's a wide selection of kits that will have you completely hooked.
Shopping
For those new to handmade crafts, click here.
We want many people to experience the joy of making things by hand. That's why we have a wide selection of beginner-friendly lesson kits in our "Basics for Beginners" series.
Shopping
お す す め コ ン テ ン ツ
Shop for craft and DIY kits and handmade goods here.
Shopping
編み物
I want to knit every day, I want to knit all year round.
Shopping
The sun
You're sure to find an embroidery design you want to try!
Shopping
Sashiko
Sashiko embroidery, popular for its traditional patterns and characters.
Shopping
Sewing
A collection of tips and solutions for sewing and sewing problems.
Shopping
Accessories
Handmade accessories
Shopping
Craft
Crafts, handcrafts that don't require needles and thread
Shopping
ミ ニ チ ュ ア
Small, cute, heart-fluttering miniatures
Shopping
Beginner kit
Learn to do it! Popular beginner kit
Shopping
Couturier Shop Site
Shopping
Sales campaign
Shopping
Beginner Knitting Lesson Kit
Shopping