
Easy hand-sewing at home! How to hem pants and alter them.
- Events/planning
- I tried out Couturier.
- Perfect for beginners! Easy DIY projects
- Techniques and Items
- Sewing
- Date created:
- Update date:
Common hemming methods
There are basic techniques for adjusting the hems of your bottoms. Learning them correctly will allow you to use them in a variety of situations!
◇Regular festival
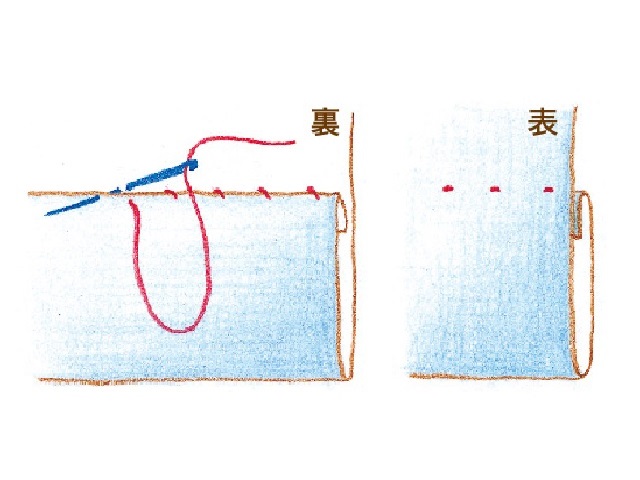
This is the most common method of hemming by hand. To prevent the stitches from showing on the outside, you hem by picking up about 1 mm of the outer fabric.
◇ Nagashi Matsuri (Floating Festival)
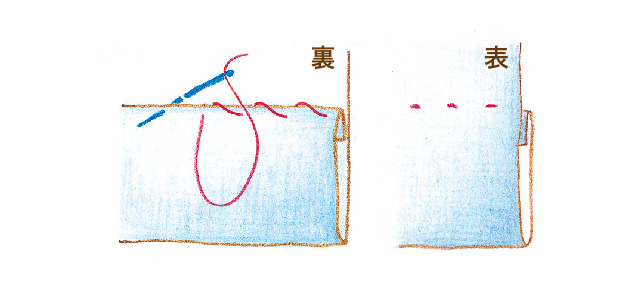
Because the stitches are spaced further apart than with a regular whip stitch, this method is effective for hemming fabrics where you want to give them some movement (such as soft fabrics or linings).
◇Chidori-gake
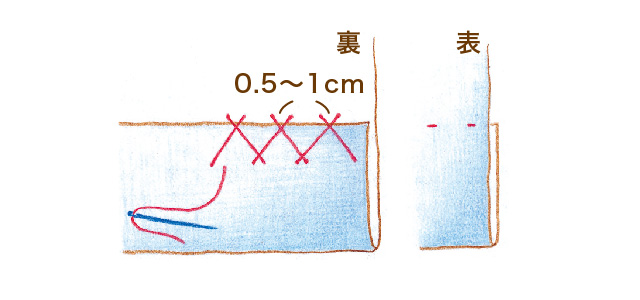
If you don't want the seam allowance to be bulky, fold it in half instead of in thirds and sew it using this method. For fabrics that fray easily, sew a zigzag stitch along the edge beforehand.
◇Triple-fold stitch
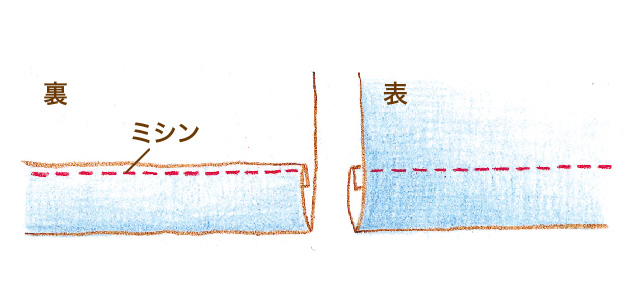
This is a common hemming method seen on casual clothing and workwear. A sewing machine is usually used. Because the stitching is visible on the outside, it's used when you want to make effective use of stitching or when you want a durable hem. When sewing thick fabrics like jeans, you'll need a heavy-duty sewing machine needle and thread, and you'll need to manually turn the machine where multiple layers of fabric overlap.
Tips for hemming
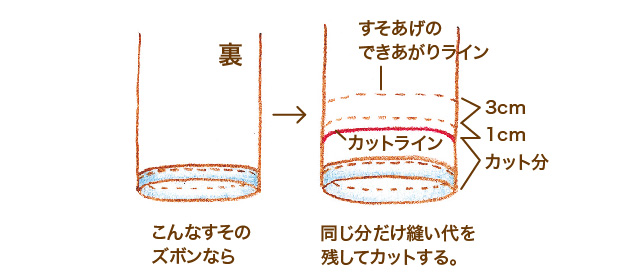
Hemming the garment using the same method as the original design will result in a seamless finish. Check whether the seam allowance is 1cm or 3cm and finish it in the same way.
Let's make a hem-sizing ruler!
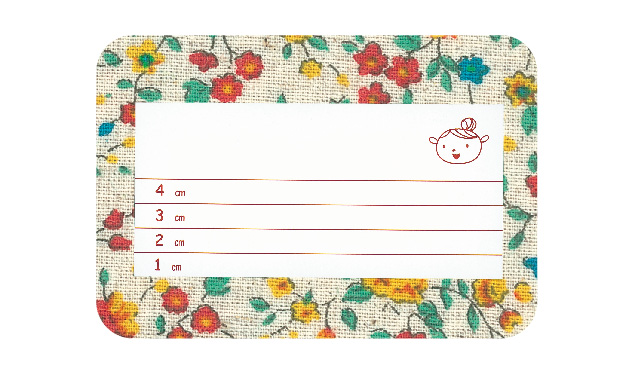
Regular acrylic rulers cannot be used for hemming because they cannot be ironed. So, let's make our own hem ruler by drawing markings on a postcard or cardboard that you have at home! Place it against the edge of the fabric and fold the fabric with an iron, and you can determine the hem line without making any marks.
Key points when making a hem ruler
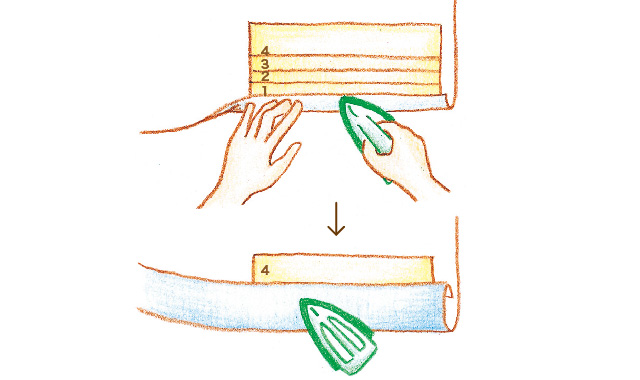
Even when using a transparent ruler to mark the hem, be sure to fold the seam allowance with an iron before sewing. A little extra effort makes a huge difference in the finished product.
Hemming procedure
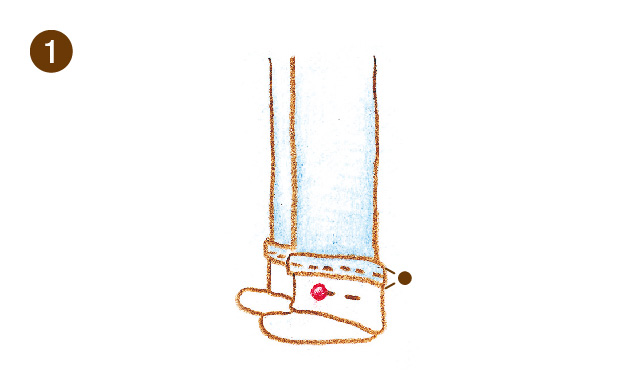
While wearing the garment, fold up the hem and have someone else pin it in place (leave it a little longer as you will be wearing shoes).
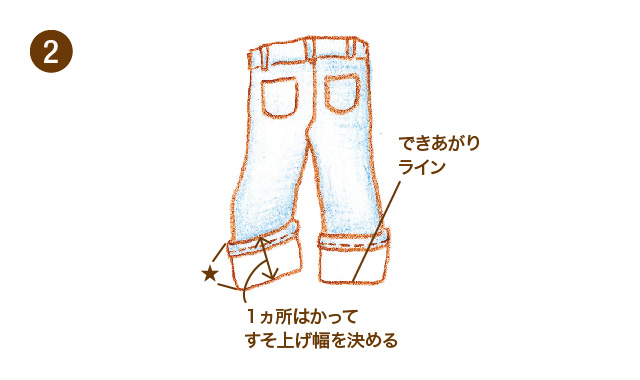
Measure the length at one point on the heel or side of the foot, and use that length as the total hem width.
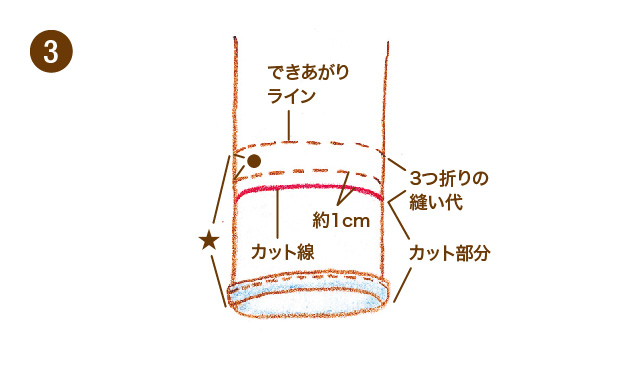
Determine the cutting line by adding the seam allowance to the finished line.
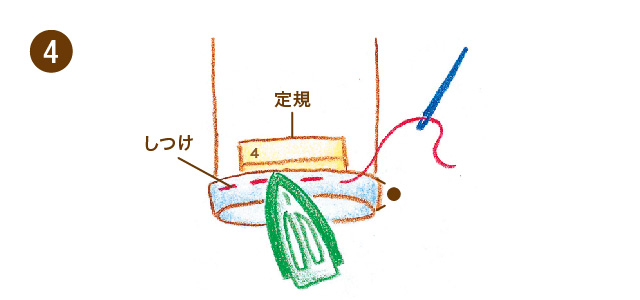
Using a hem ruler, fold the hem three times with an iron and baste it in place.
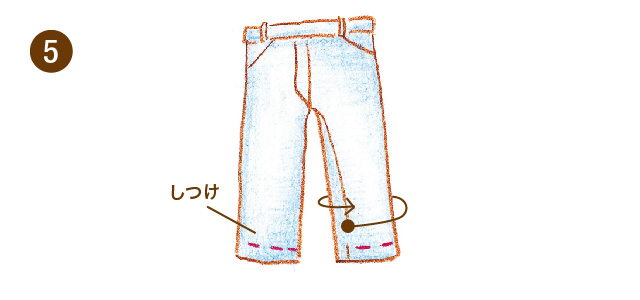
Start sewing from the less visible inner part using a triple-fold stitch or a regular blind stitch.
Learn various techniques and hem your pants with ease!
Mastering various hemming techniques can be useful when you want to adjust ready-made clothing to fit you perfectly!
The Couturier blog offers tips and tricks for various crafts, including embroidery, sewing, and knitting. Don't miss the Couturier shop, where you can purchase crafting kits, and our official social media accounts!
▽Click here for a list of sewing and tailoring articles.
▽Click here for a list of sewing and sewing products.
▽Click here for the Couturier Shop
The products featured in this article are listed here.

"Couturier Club" registration fee (annual registration)
The "Couturier Club" membership fee (annual registration) is only 100 yen per month, and you'll get access to tons of great member benefits! Enjoy introductory prices on your first purchase, and every month, you'll receive "Couturier's Seeds," packed with fun and useful information such as seasonal crafting ideas, original works by artists, and crafting techniques. We look forward to you joining the "Couturier Club" and having fun together!
A Beginner's Guide to Sewing: A Study Group
For those of you who have been doing things your own way until now, why not take this opportunity to properly learn sewing? With this kit, you'll start with basic stitches, learn how to attach buttons and zippers, do simple embroidery, make bags, and eventually be able to make a bag.

"The Basics for Beginners": A First Aid Kit for Everyday Sewing - Needlework Lessons
Solve your "problems!" yourself. A needlework lesson like a first-aid kit for everyday use. "The hem of my skirt is coming undone, how do I sew it?", "How do I hem pants?", "The handles of my eco-bag are falling apart, can I do something about it?", "A button is about to fall off, what should I do?". This lesson is designed to solve those everyday needlework "problems!" that arise! We'll teach you the correct way to do basic sewing and button attachment, as well as ideas for easy and time-saving tasks. We'll also provide you with essential sewing tools and handy items that you can use right away.
SHARE


Related article
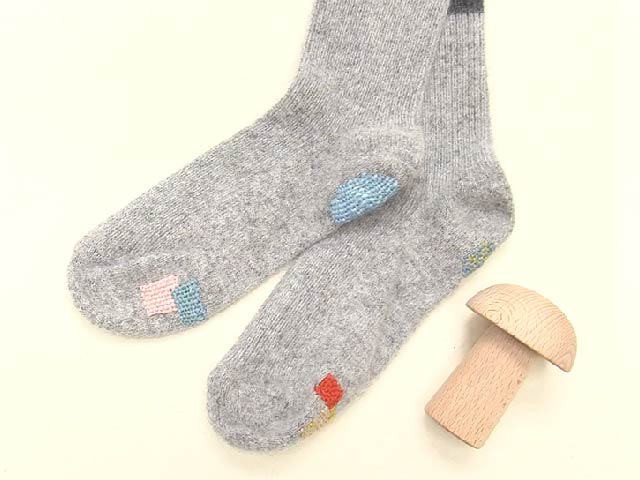
[Video] Repairing holes in socks! Easy and cute sewing method using a darning mushroom
Sewing
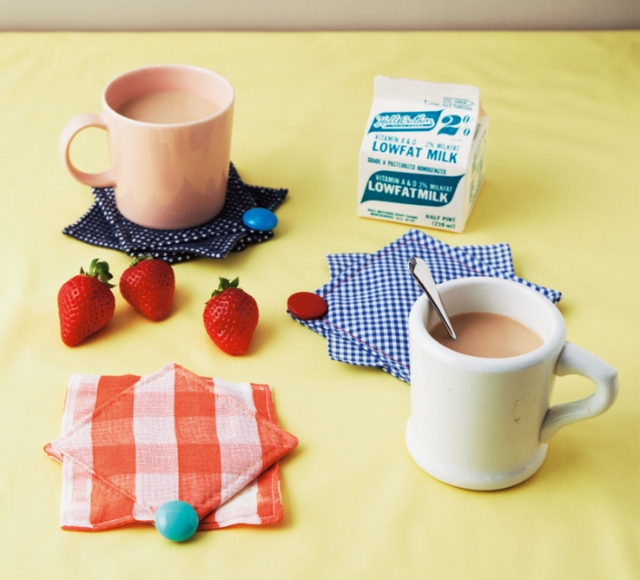
[Free Sewing Recipe] Easy sewing project using leftover fabric: Origami Coaster
クチュリエの種
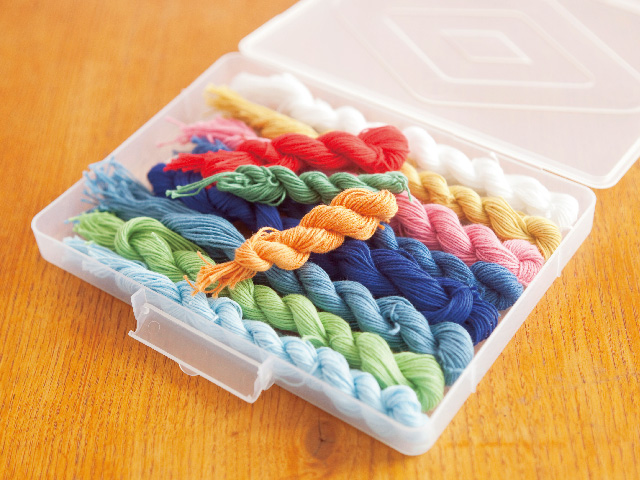
How to handle skeins of yarn – how to use them without tangling.
Sewing
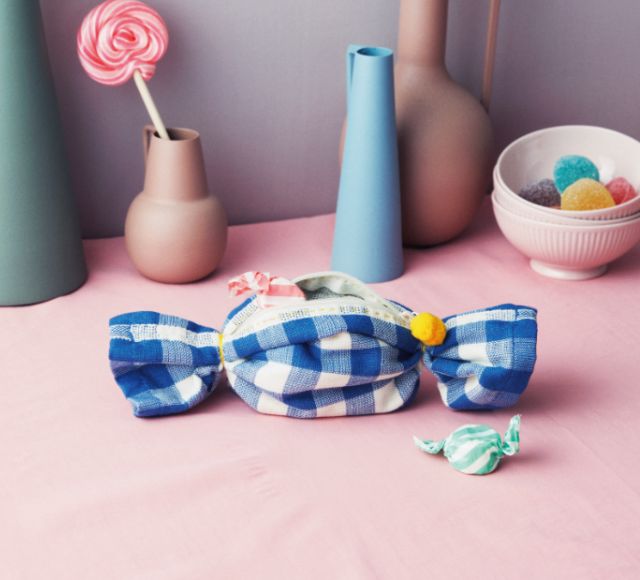
[Free Sewing Recipe] A cute little pouch you can make with just a little sewing: a candy pouch made from gauze towel.
クチュリエの種
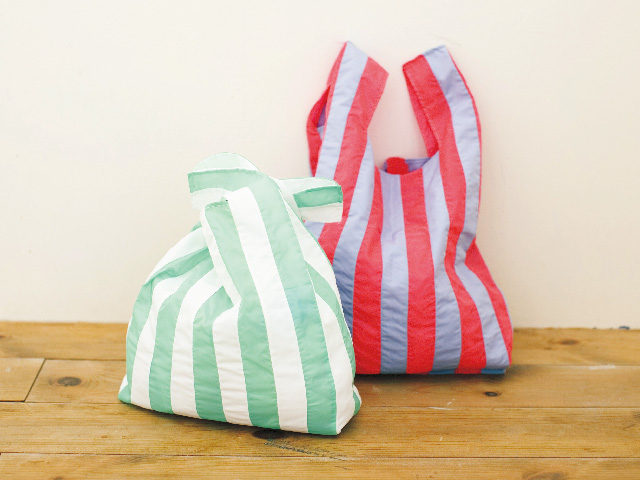
Perfect for plastic shopping bags! How to make a striped eco-bag
Sewing
Rediscover new charms through our collaboration with couturiers!
Cloth
Articles I recently read

If you feel like doing some handicrafts (handmade crafts),
To the Couturier Shop

Shopping
Once you get hooked, you'll be completely engrossed!
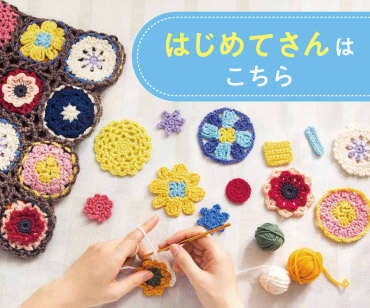
These kits are long-selling and popular items at Couturier. From knitting and joining pieces to creating and wearing them, and enjoying various arrangements, there's a wide selection of kits that will have you completely hooked.
Shopping
For those new to handmade crafts, click here.
We want many people to experience the joy of making things by hand. That's why we have a wide selection of beginner-friendly lesson kits in our "Basics for Beginners" series.
Shopping
お す す め コ ン テ ン ツ
Shop for craft and DIY kits and handmade goods here.
Shopping
編み物
I want to knit every day, I want to knit all year round.
Shopping
The sun
You're sure to find an embroidery design you want to try!
Shopping
Sashiko
Sashiko embroidery, popular for its traditional patterns and characters.
Shopping
Sewing
A collection of tips and solutions for sewing and sewing problems.
Shopping
Accessories
Handmade accessories
Shopping
Craft
Crafts, handcrafts that don't require needles and thread
Shopping
ミ ニ チ ュ ア
Small, cute, heart-fluttering miniatures
Shopping
Beginner kit
Learn to do it! Popular beginner kit

Shopping
Couturier Shop Site
Shopping
Sales campaign
Shopping
Beginner Knitting Lesson Kit
Shopping