
It's a waste to throw them away! How to make a sewing tray using cellophane tape cores and zippers.
- Events/planning
- Craft
- Craft artist
- Tape, cord, string
- Paper craft
- ボ タ ン
- Remake recipes
- Fabrics, materials, ingredients
- Reading
- Date created:
- Update date:
Kumiko Abe's Remake Recipes
"I might use it someday..." Empty boxes and cans that have been stored away with that thought in mind. These everyday materials that you can't bring yourself to throw away are beautifully transformed with Kumiko Abe's remaking ideas.

Sewing tray made from cellophane tape core and zipper
The core of a cellophane tape roll is a nice round shape and very sturdy. You can easily make a tray by making a base out of cardboard. I tried using a zipper to decorate the sides, and the width of one side of the zipper was a perfect match for the width of the tape core, with the teeth of the zipper acting as a decorative edge. It seems like it could be used not only when sewing, but also for temporarily placing earrings, rings, and other small items.

★Things you'll need★
- The core of a roll of cellophane tape
Black cardboard
・English newspaper
·fastener
• Lace (approximately 6mm wide)
• Decorative buttons
★How to make it★
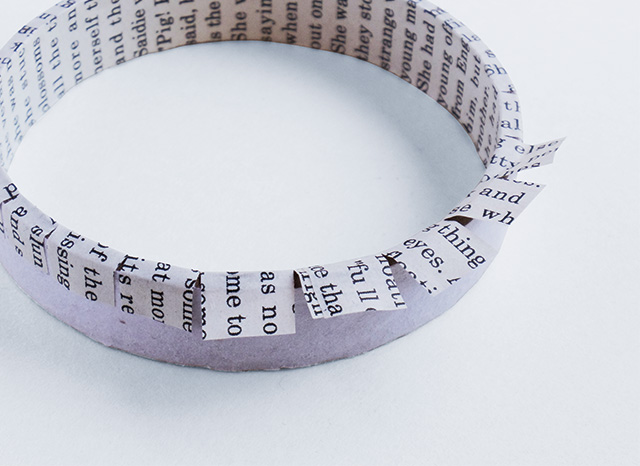
① Apply a thin, even layer of adhesive to the inside of the cellophane tape core, and then attach a strip of English newspaper (2.5 x 25 cm). Place the cellophane tape core on a flat surface, and then carefully attach the strip of English newspaper little by little, following the inside of the core for a neat finish. Once the inside is covered, cut the excess paper at the top into 1 cm strips and fold them over the outside of the cellophane tape core, then glue them in place.
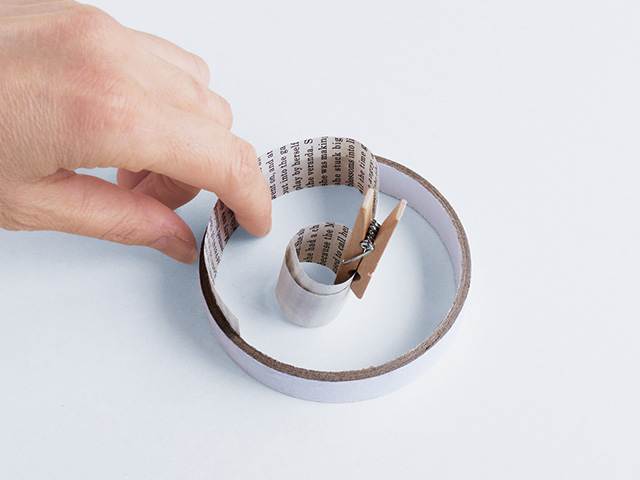
If the length of the paper gets in the way of your work, it's convenient to roll up the end and secure it with a clothespin.
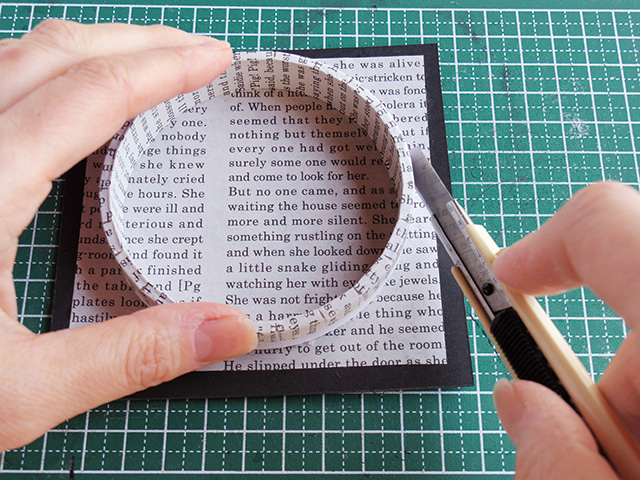
② Cut a piece of black cardboard slightly larger than the outer diameter of the cellophane tape core and attach a piece of English newspaper to it (the bottom part). Apply adhesive evenly to the back of the cellophane tape core (the cross-section) and place it on top of the black cardboard with the English newspaper attached (the bottom part), pressing it down firmly. Once completely dry, use a utility knife to cut along the outline of the core and trim off any excess cardboard.

③ Cut off all the fasteners from the zipper, remove the slider, and separate the tape into two pieces. Cut these to the length that matches the outer diameter so that they can be attached snugly to the side.
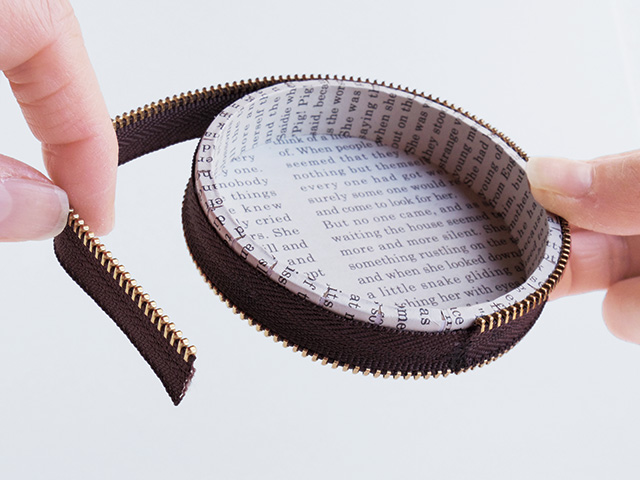
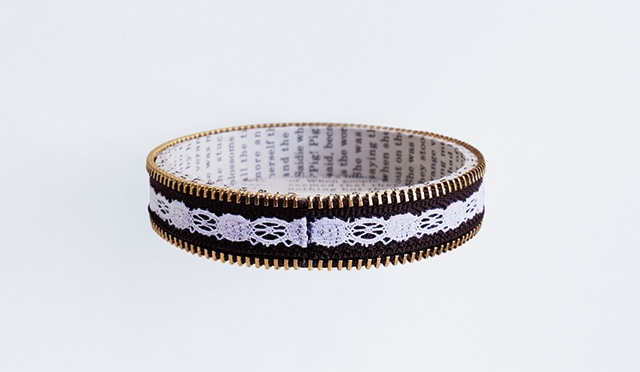
④ Place the cake tray with the glass part of the empty bottle attached in step ② over it. Do not fix this with adhesive so that it can be attached and removed. Attach the printed label to the base and glue a button with a hole on the back to the top to finish. Attach tape so that the teeth of the zipper are at the bottom, then overlap and attach tape so that the teeth are at the top. Next, attach a narrow piece of lace to the center of the side. Make sure the seams of both the tape and the narrow lace are on the front. Finally, attach a decorative button to hide the seams to finish.
★Tips for making it★

Apply tape so that the teeth of the zipper are facing downwards, then apply another piece of tape so that the teeth are facing upwards. Finally, attach a narrow strip of lace to the center of the side.

Make sure the seams of both the tape and the narrow lace are facing the front. Finally, attach decorative buttons to hide the seams, and you're done.
The sewing tray is finished!


Kumiko Abe
A housewife and creator who enjoys making things by hand. She excels at arranging everyday materials with her own creative ideas. Lately, she's been drawn to dollhouses, but she's being cautious because it's like a bottomless pit once you get hooked.
Instagram: @kumideek2

The products featured in this article are listed here.

[¥100 per month] Join the "Couturier Club"!
Join the "Couturier Club" and enjoy tons of great member benefits for just 100 yen a month! Enjoy introductory prices on your first purchase, and our monthly newsletter, "Couturier's Seeds," is packed with fun and useful information, including seasonal crafting ideas, original works by artists, and crafting techniques. We look forward to you joining the "Couturier Club" and enjoying crafting together!
SHARE


Related article
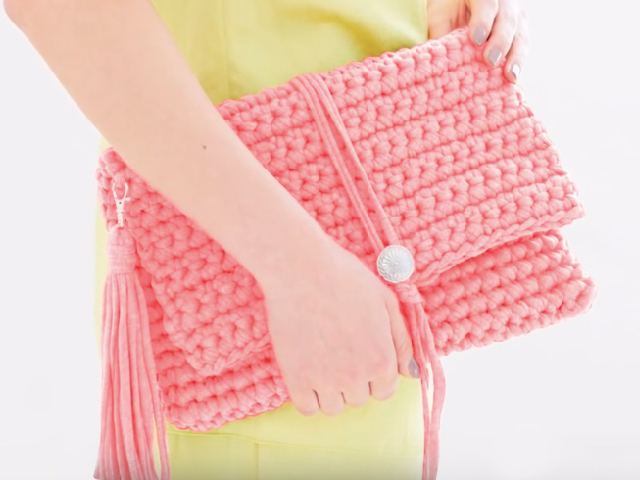
Perfect for craft beginners! A quick DIY project: How to make a tassel using leftover Zpagetti yarn.
Tape, cord, string

It's a waste to throw them away! How to make Western-style mini kokeshi dolls from short pencils.
Tape, cord, string

Parent-child cushions made with piping tape / Yukinko's carefree and easygoing handmade life
Sewing

How to use rickrack tape (mountain trail tape)
Sewing
It's a waste to throw them away! How to make a sewing tray using cellophane tape cores and zippers.
Tape, cord, string

It's a waste to throw it away! How to make a flower vase by repurposing a cardboard tube from a roll of plastic wrap.
Tape, cord, string
Articles I recently read

If you feel like doing some handicrafts (handmade crafts),
To the Couturier Shop

Shopping
Once you get hooked, you'll be completely engrossed!
These kits are long-selling and popular items at Couturier. From knitting and joining pieces to creating and wearing them, and enjoying various arrangements, there's a wide selection of kits that will have you completely hooked.
Shopping
For those new to handmade crafts, click here.
We want many people to experience the joy of making things by hand. That's why we have a wide selection of beginner-friendly lesson kits in our "Basics for Beginners" series.
Shopping
お す す め コ ン テ ン ツ
Shop for craft and DIY kits and handmade goods here.

Shopping
編み物
I want to knit every day, I want to knit all year round.
Shopping
The sun
You're sure to find an embroidery design you want to try!

Shopping
Sashiko
Sashiko embroidery, popular for its traditional patterns and characters.

Shopping
Sewing
A collection of tips and solutions for sewing and sewing problems.

Shopping
Accessories
Handmade accessories

Shopping
Craft
Crafts, handcrafts that don't require needles and thread

Shopping
ミ ニ チ ュ ア
Small, cute, heart-fluttering miniatures

Shopping
Beginner kit
Learn to do it! Popular beginner kit

Shopping
Couturier Shop Site
Shopping
Sales campaign

Shopping
Beginner Knitting Lesson Kit
Shopping