
Water flea shrink plastic keychain / Yukinko's carefree and easygoing handmade crafts
- Date created:
- Update date:

Hello everyone. How are you? This month's project uses materials I've never used before in my series: shrink plastic and resin.
Water flea shrink plastic keychain

Shrink plastic is a popular craft material that even elementary school students can easily enjoy, and I think many people have either "tried it" or "seen it" before. It's so familiar to me that I'd never thought about making anything with it. However, my daughter asked me to "make a keychain to put on the bag I carry around on weekends," so I decided to give it a try on a whim. When I asked my daughter what she wanted, she made a series of requests, such as "I want a water flea!", "Don't draw the internal organs", and "Make the heart heart-shaped and pink." That's right, my daughter has been obsessed with microorganisms for the past two years.
"Plastic shrink plastic is transparent, and water fleas are transparent too. What a perfect match!" I exclaimed excitedly and immediately started making them. At first, I thought it would be easy to just draw an illustration and bake it in the toaster oven, but for some reason, I wasn't impressed when I saw the finished product. After making seven or eight of them, I finally realized that the important thing with plastic shrink plastic is to find a balance that makes you think, "Wow, it's so cute!" when it shrinks.
After much trial and error, I discovered that drawing a 2.8cm-long water flea on a 0.4mm-thick plastic sheet with a 1mm-wide marker resulted in a nice finish when it shrunk. I made over 100 water fleas before I was satisfied. My daughter saw me endlessly toasting them in front of the toaster and nicknamed me "Yujinko," the water flea craftsman (lol).
For this project, I sandwiched a water flea between two transparent cases, allowing it to move around inside as if viewed under a microscope. To create a gap of about 0.5 mm for the water flea to move, I experimented with various molds for the resin-filled cases, using pudding cups and cotton swab lids, before finally finding that two corrugated aluminum cups joined together worked perfectly. I glued them together, drilled holes, and smoothed the whole thing with an electric sander to complete it. This hands-on experience made me realize that even seemingly simple crafts can be incredibly complex.
Next time we look forward to.

Yukinko
I've been contributing to the magazine "Couturier no Tane" since its inception. As my daughter grows, I've also found more free time. Lately, I've been completely engrossed in sewing.
Instagram:@yukinko_no_kurashi
The products featured in this article are listed here.

"Couturier Club" registration fee (annual registration)
Join the "Couturier Club" and enjoy tons of great member benefits for just 100 yen a month! Enjoy introductory prices on your first purchase, and our monthly newsletter, "Couturier's Seeds," is packed with fun and useful information, including seasonal crafting ideas, original works by artists, and crafting techniques. We look forward to you joining the "Couturier Club" and enjoying crafting together!
SHARE


Related article

Weaving in my overflowing curiosity - Part 2
編み物作家

I'm obsessed with fluffy mohair knitting! / Paris Love Diary
編み物

My handmade "Apple Pie Quilt"
Patchwork quilt artist

Creating truly unique garments / Beloved handmade items
Sewing

Sewing: "Winter Tropical Pants" / Yukinko's Carefree and Easygoing Handmade Life
Sewing

Knitting comedian Aiper Takizawa's Knitting Wonderful! Life Vol. 1
クチュリエの種
Articles I recently read

If you feel like doing some handicrafts (handmade crafts),
To the Couturier Shop

Shopping
Once you get hooked, you'll be completely engrossed!
These kits are long-selling and popular items at Couturier. From knitting and joining pieces to creating and wearing them, and enjoying various arrangements, there's a wide selection of kits that will have you completely hooked.
Shopping
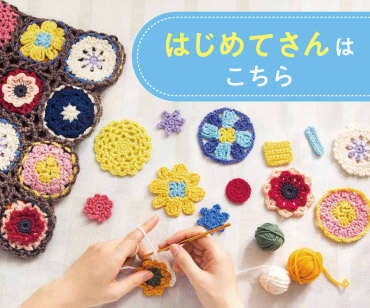
For those new to handmade crafts, click here.
We want many people to experience the joy of making things by hand. That's why we have a wide selection of beginner-friendly lesson kits in our "Basics for Beginners" series.
Shopping
お す す め コ ン テ ン ツ
Shop for craft and DIY kits and handmade goods here.
Shopping
編み物
I want to knit every day, I want to knit all year round.
Shopping
The sun
You're sure to find an embroidery design you want to try!

Shopping
Sashiko
Sashiko embroidery, popular for its traditional patterns and characters.
Shopping
Sewing
A collection of tips and solutions for sewing and sewing problems.
Shopping
Accessories
Handmade accessories
Shopping
Craft
Crafts, handcrafts that don't require needles and thread
Shopping
ミ ニ チ ュ ア
Small, cute, heart-fluttering miniatures
Shopping
Beginner kit
Learn to do it! Popular beginner kit

Shopping
Couturier Shop Site
Shopping
Sales campaign
Shopping
Beginner Knitting Lesson Kit

Shopping