
Handmade cute animal-themed brooches that you'll want to take with you wherever you go.
- Date created:
- Update date:

If you have experience with embroidery, you've probably thought at least once about making cute animals with embroidery, or creating accessories with embroidery. But when you actually try it, you might find yourself unsure of how to turn them into accessories, or how to even begin making them, right?
So this time, we'll show you how to easily make animal-themed accessories, suitable for everyone from experienced embroiderers to beginners."A Collection of Animal Mascot Brooches with Vibrant Stitches that Bring Life to Life"Let me introduce you to this. The person taking on the challenge of making the kit is a staff member who is a complete beginner at embroidery.
Even beginners can do it! Let's create your very own animal design.♪

The kit includes instructions, pre-printed felt fabric, felt fabric for making a brooch, stuffing, embroidery thread, yarn, and a brooch pin.
Items you will need to prepare separately include embroidery needles, yarn embroidery needles, sewing needles, pins (safety pins), scissors, ruler, chopsticks (any thin ones that can be stuffed with cotton will do), cotton swabs or cotton balls, tailor's chalk or pencil, etc.
It's so cute that you become engrossed in stitching while learning various techniques.
First, you'll embroider onto felt fabric that already has the design printed on it. You'll use 12 different colors of thread. There are 24 steps involved in embroidering the fine details and textures, but you'll be fine if you follow the instructions.
The stitching technique used is one of five types: straight stitch, chain stitch, satin stitch, backstitch, and French knot stitch. It was my first time doing chain stitch and French knot stitch, but the instructions were clearly written, so I was able to start stitching right away.

I used 10 steps and 8 threads to finish the face. This design was drawn by artist Mari Kamio, and I was amazed by how colorful and delicate it was, especially how she used yarn to create the intricate details of the ferret's fur and the fluffy texture of its chest. I continued stitching with excitement.

This was my first time using yarn for embroidery, and it created a different look compared to using embroidery thread. I really like the three-dimensional effect when viewed from the side.

This is what it looks like after I've finished stitching all the intricate details. I was able to use techniques I'd never used before, and I was completely absorbed in the stitching process.

Next, we move on to the process of stuffing the embroidered felt with cotton to make a felt mascot. Secure the embroidered felt to another piece of felt using pins (safety pins) to prevent it from shifting.
Cut along the outline with scissors and sew the edges in place with a whip stitch. Sew a little at a time, stuff with cotton, and repeat until you have a plump ferret like the one in the sample photo, and it's almost finished.

Finally, sew the included brooch pin to the back, and your brooch is complete. The estimated production time is about 5 hours, but since this was my first time using this stitching technique and I proceeded very carefully with the finishing touches on the mascot, it took me about 6 hours to complete.
A colorful felt brooch featuring an adorable animal motif is complete.

The finished brooch is about the size of my palm. I just stitched it according to the pattern, but because I spent so much time on it, I feel a real attachment to it.
I thought it would be great to attach to a simple bag as an accent, or because it has a strong presence, you could even display it in your room as part of your interior decor.
This kit is designed to be enjoyable for both experienced embroiderers and complete beginners, so please give it a try!
Here are some examples of animal mascot brooches made by our Couturier staff.
These animals, with their fresh and vibrant colors, are truly unique and stylish. Try attaching them to a simple hat or bag and take them with you wherever you go!
The unique, colorful, and eye-catching designs make them perfect for adding a touch of flair to a simple bag, or for decorating your room as interior decor.
This kit teaches various embroidery techniques and shows you the steps to create a brooch, making it enjoyable for both experienced embroiderers and beginners. Please take a look at these adorable, slightly quirky animals!
The products featured in this article are listed here.

A vibrant, lifelike stitch animal mascot brooch collection.
Artist Mari Kamio, who is attracting attention in the art and fashion scenes, makes her debut in Couturier. "I wanted to create something that you can enjoy twice—making it, wearing it, and having fun and using free and fun colors, using my favorite wild animals as motifs." Kamio's idea has been transformed into a brooch kit of animals to be vividly embroidered using 12 colors of thread. The design is printed on easy-to-embroider felt, making it recommended for beginners. Complete these adorable companions that look like they could start talking at any moment.
SHARE


Related article

Enchanted by the cloches of Lunéville
Bead embroidery

Let's try cross-stitching using Haruharu Canvas!
Cross stitch

Embroidery Festa "Alphabet SAL" Embroidery Pattern 1 (A, B, C, D)
Embroidery

Recommended for beginners. An easy embroidery DIY frame kit to add a touch of beauty to your life.
Embroidery hoop

What is an embroidery hoop? We'll teach you how to use it and even how to make one yourself!
Embroidery hoop

How to do Swedish embroidery, with its beautiful patterns and thread gradations.
Articles I recently read

If you feel like doing some handicrafts (handmade crafts),
To the Couturier Shop

Shopping
Once you get hooked, you'll be completely engrossed!
These kits are long-selling and popular items at Couturier. From knitting and joining pieces to creating and wearing them, and enjoying various arrangements, there's a wide selection of kits that will have you completely hooked.
Shopping
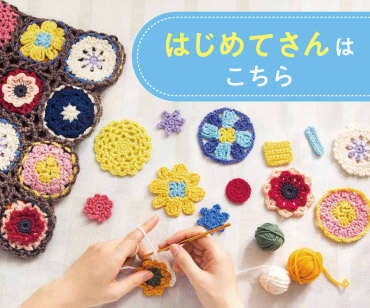
For those new to handmade crafts, click here.
We want many people to experience the joy of making things by hand. That's why we have a wide selection of beginner-friendly lesson kits in our "Basics for Beginners" series.
Shopping
お す す め コ ン テ ン ツ
Shop for craft and DIY kits and handmade goods here.
Shopping
編み物
I want to knit every day, I want to knit all year round.
Shopping
The sun
You're sure to find an embroidery design you want to try!
Shopping
Sashiko
Sashiko embroidery, popular for its traditional patterns and characters.
Shopping
Sewing
A collection of tips and solutions for sewing and sewing problems.
Shopping
Accessories
Handmade accessories
Shopping
Craft
Crafts, handcrafts that don't require needles and thread
Shopping
ミ ニ チ ュ ア
Small, cute, heart-fluttering miniatures
Shopping
Beginner kit
Learn to do it! Popular beginner kit

Shopping
Couturier Shop Site
Shopping
Sales campaign
Shopping
Beginner Knitting Lesson Kit

Shopping