
[Video Explanation] How to do satin stitch embroidery to fill in areas - including long, short, and straight stitches -
- Date created:
- Update date:

From the basic stitches of embroidery, this time we'll introduce stitches used to fill in areas. We'll cover the most common "satin stitch" and "long and short stitch," as well as how to roughly fill in areas with the "straight stitch." Be sure to check out the tips for neat stitching shared by an embroidery artist.
table of contents
Materials and tools needed
Basically, all you need to get started is embroidery thread and a fabric needle.
Embroidery thread
This time, I'm using standard size 25 embroidery thread.
·cloth
Applying fusible interfacing to thin fabrics makes them easier to embroider.
Embroidery needle
Since they are often labeled as "for ◯ strands," use a French embroidery needle of the appropriate thickness for the number of strands of thread.
Embroidery hoop
By stretching the fabric taut, it becomes easier to adjust the tension of the thread and you won't need to use unnecessary force, so please be sure to prepare it.
Chalk pencil
・ Scissors
・Adhesive core
etc.
How to do embroidery to fill an area
Let's learn the basic stitches for filling in areas.
◇ How to do satin stitch
Pay attention to the angle of the first stitch.

Thread the thread across the entire design, filling in any gaps with stitches. The angle of the first stitch will make a difference in the final result.
◇Satin stitch explained in a video
◇ How to do the long and short stitch
As the name suggests, you insert and embed the needles by varying the length of the stitches.

Stitch from the outside of the design, alternating between long and short stitches, and from the second row onwards, stitch so that they slightly overlap with the previous row.
◇Long and short stitches explained in a video
◇ How to do a straight stitch
Even a simple straight stitch, which involves stitching a single line, can be repeated to fill in an area.

Stitch straight stitches randomly to fill in the stitches evenly and balanced throughout. Varying the length of the stitches will create a natural finish.
Advice for achieving a beautiful finish
Here are some tips for making your embroidery look even more beautiful.
◇ Carefully copy the design

If the lines of the design are vague, the outline will not come out clearly.
◇Use an embroidery hoop and do not pull the thread too tight.

Stretching the fabric taut in the embroidery hoop prevents the thread from being pulled too tight.
◇Symmetrical designs start from the center.

It's easier to achieve balance if you insert the needles in half, starting from the center and working your way outwards.
◇ Pay attention to the direction of the stitches.


Imagine the original form of the motif you are embroidering and decide on the direction of your stitches.
Embroidery can be a captivating art form. Master the techniques and enjoy a fun, handcrafted life!
French embroidery is fun because the design fills up with colorful stitches. Paying attention to the details will result in an even more beautiful piece.
The Couturier blog offers tips and tricks for various crafts, including embroidery, sewing, and knitting. Don't miss the Couturier shop, where you can purchase crafting kits, and our official social media accounts!
▽Click here for a list of embroidery articles
▽Click here for a list of embroidery kits.
▽Click here for the Couturier Shop

The products featured in this article are listed here.

Master 22 types of stitches: Embroidery "Basic Basics for Beginners" Lesson
Master 22 different stitches in 6 sessions. You'll practice the same stitch repeatedly, from using one strand to six strands, so your fingertips will naturally memorize the needle movements. In addition to the cloth used for the lesson, you can make small, applied projects in each session.

"Couturier Club" registration fee (annual registration)
Join the "Couturier Club" and enjoy tons of great member benefits for just 100 yen a month! Enjoy introductory prices on your first purchase, and our monthly newsletter, "Couturier's Seeds," is packed with fun and useful information, including seasonal crafting ideas, original works by artists, and crafting techniques. We look forward to you joining the "Couturier Club" and enjoying crafting together!

Embroidery Lessons: Starting with a Single Stitch
This is the third installment in the highly popular "Step-by-Step Lesson" series, the easiest in the "Basic Basics for Beginners" series. Even complete beginners who have never held a needle before can do it! This embroidery lesson sets the barrier to entry for handmade crafts much lower. You will thoroughly learn six basic stitches that will be useful enough to continue as a hobby after completing the lesson. Almost all tools other than scissors are included in the set, so you can get started with ease.
SHARE


Related article

A visit to the studio of popular embroidery artist Hiroko Ishii
French embroidery

Embroidery Festa "Alphabet SAL" Embroidery Pattern 6 <X, Y, Z>
Embroidery

[Outline Stitch] Basic stitching technique for embroidery beginners!
French embroidery

[Free] Embroidery Pattern ① "Couturier Mystery SAL" | Embroidery Festa 2026
Embroidery Festa

A fantasy drawn with thread, replacing the paintbrush with a needle.
Visiting handmade craft artists

The secret to creating beautiful embroidery works! Life in a meticulously designed atelier.
French embroidery
Articles I recently read

If you feel like doing some handicrafts (handmade crafts),
To the Couturier Shop

Shopping
Once you get hooked, you'll be completely engrossed!
These kits are long-selling and popular items at Couturier. From knitting and joining pieces to creating and wearing them, and enjoying various arrangements, there's a wide selection of kits that will have you completely hooked.
Shopping
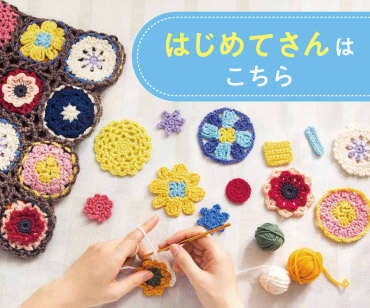
For those new to handmade crafts, click here.
We want many people to experience the joy of making things by hand. That's why we have a wide selection of beginner-friendly lesson kits in our "Basics for Beginners" series.
Shopping
お す す め コ ン テ ン ツ
Shop for craft and DIY kits and handmade goods here.
Shopping
編み物
I want to knit every day, I want to knit all year round.
Shopping
The sun
You're sure to find an embroidery design you want to try!
Shopping
Sashiko
Sashiko embroidery, popular for its traditional patterns and characters.
Shopping
Sewing
A collection of tips and solutions for sewing and sewing problems.
Shopping
Accessories
Handmade accessories
Shopping
Craft
Crafts, handcrafts that don't require needles and thread
Shopping
ミ ニ チ ュ ア
Small, cute, heart-fluttering miniatures
Shopping
Beginner kit
Learn to do it! Popular beginner kit

Shopping
Couturier Shop Site
Shopping
Sales campaign
Shopping
Beginner Knitting Lesson Kit

Shopping