
Cute letter folding ideas ♪ Including hearts and shirts
- Date created:
- Update date:

Sending a letter to someone is more fun when it's in a cute shape like this, isn't it? This time, we'll introduce various creative ways to fold letters, such as hearts and fish!
table of contents
◇ How to fold a heart
Receiving a message with a cute heart design makes me so happy!

Fold it in half vertically, using the valley fold method.

Fold horizontally in a valley fold to create a center line, then fold the bottom edge in a valley fold to align with the center line. Do the same on the left side.

Fold the part that is sticking out towards the back in a valley fold. Do the same on the right side.

Open and flatten the part you folded in step ③. Do the same on the right side.

Fold the top edge inwards along the center line. Do the same on the right side.

Fold the protruding triangular section inwards. Do the same on the right side.

Fold the bottom edge inwards along the center line. Do the same on the right side.

Fold the left edge inwards along the indicated area. Do the same on the right side.

Fold the top left corner inwards. Do the same on the right side.

It's done.
◇ How to fold a bottle
First, you can make a regular bottle, and with a little extra effort, you can also make a slimmer bottle.

Fold it in half lengthwise, creating a valley fold and marking the center line.

Fold the top left and bottom left corners inwards along the center line.

Turn it over and fold the triangular section down by one-third of its height using a valley fold.

Turn it over, fold the left edge inwards along the center line, and do the same for the top and bottom.

Fold the top and bottom edges inwards along the center line.

Fold the right edge inwards by about 1 cm, then fold it inwards again to the dotted line.

Insert the 1cm folded portion to secure it.

Turn it over, widen the gap at the top, lift it up, and flatten it.

At step ⑤, if you fold the top and bottom edges to align with the center line, you will get a slim bottle.

It's done.
◇ How to fold a fish
A unique fish-shaped letter. It's sure to delight young children!

Fold the right edge inwards, aligning the top and bottom edges, and do the same with the left edge.

Fold the bottom corner inwards, aligning it with the center of the top edge.

Fold the bottom right corner inwards, aligning it with the center of the top edge.

Fold the right corner inwards, aligning it with the center of the top edge.

Fold the upper right corner inwards, aligning it with the center of the top edge.

Once you've created this shape, turn it over.

Fold the bottom right corner inwards, aligning it with the center of the top edge.

Continue folding in the same way as in steps ④ and ⑤.

Twist the overlapping tails upside down.

It's done.
◇ How to fold a bamboo shoot
The overlapping shape looks just like a bamboo shoot! A unique letter like this is sure to bring a smile to the recipient's face!

Fold it in half vertically using the valley fold method to create a center line. Then, fold the bottom left and bottom right corners along the center line using the valley fold method, and fold the top edge along the center line using the valley fold method.

Fold the bottom edge to the center line, create a crease, and then unfold it.

Fold the left and right edges inwards along the fold lines you made in step ②.

Fold the bottom edge inwards along the center line, then turn it over.

Fold the right corner in the valley fold position shown in the diagram.

Similarly, fold the left corner in the same way as shown in the diagram.

Insert the left end into the fold on the right side to secure it.

Turn it over and fold the top right corner inwards along the center line. Do the same with the top left corner, folding it inwards along the center line.

Insert the left end into the fold on the right side to secure it.

Turn it right side out and it's done.
◇ How to fold a shirt
Using patterned paper will give it a stylish finish!

Fold it in half lengthwise using a valley fold to create a center line. Fold the left and right edges along the center line using a valley fold.

Open the paper and make valley folds along the fold lines you made in step ①.

Fold the bottom edge up to match the width you folded in step ②.

Insert your finger into the triangle (➡︎), lift it up, and fold it inwards along the dotted line.

Pinch the triangular part and pull it downwards while folding the left and right edges inwards to align with the center line.

Fold the triangle that is sticking out at the bottom outwards.

Turn it over and make a valley fold about 1 cm from the top.

Turn it over, and fold it into a triangle by valley folding, aligning the top left and top right corners with the center line.

Fold the bottom edge up to match the part shown in the diagram.

Simply tuck the folded-up part into the collar and you're done. I tried adapting it for uniforms and polka-dot shirts.
◇ How to fold a hexagon

Fold it in half lengthwise (valley fold).

Fold both sides inwards along the center line, then open only the left side.

Using the dot as the starting point, fold the bottom right corner inwards along the center line.

Fold the paper in a valley fold, aligning the marks. Then, fold the left edge in a valley fold, aligning it with the center line.

Align the left edge with the dotted line and make a valley fold.

Fold it inwards, aligning the marks.

Fold it inwards, aligning the marks.

It will be hexagonal in shape.

Insert the end into the slit as shown in the diagram.

It's finished! Because of its simple shape, it looks cute when you use colorful paper. Using color copies of fabric would also be lovely.
Send your heartfelt message with a cute letter.
If you fold a letter into a cute shape with heartfelt care, the recipient is sure to smile. Please give it a try!
The Couturier blog offers tips and tricks for various crafts, including embroidery, sewing, and knitting.
Also, don't miss the Couturier Shop, which sells DIY kits, and their official social media accounts!
▽Click here for the Couturier Shop

The products featured in this article are listed here.

A forest landscape viewed through binoculars; a paper art club enjoying paper cutting with overlapping paper.
Imagine peeking through binoculars in the forest and spotting adorable animals! A new kit is now available to capture this seasonal scene in paper cutting. Three paper cutouts are pasted onto a wooden frame and layered to create a work of art with depth. The time spent cutting the paper along the outline with a design knife is enjoyable and calming. Display it, hang it on the wall, and turn your room into a small gallery.

Minitsuku Chocotto: A set of templates and design paper for making lots of cute envelopes.
This set includes templates and design paper to help you create your own original envelopes. You can make three types of envelopes: rectangular, Western-style, and small envelopes. Each type can be made in 3-4 sizes, so you can create them to fit your needs. Stocking up on them will be useful for various occasions, such as small thank-you notes, letters, school papers, or tuition payments. You can even use your own cute wrapping paper or other papers you have lying around the house to create your own unique envelopes!

Learn how to fold and use them in a flash! A single sheet of paper can be transformed into a handy paper item: A useful origami program [6-month subscription program]
This course teaches you how to fold origami that can be used in everyday life, from entertaining guests to organizing small items, with easy-to-follow step-by-step photos. Origami, which can be made with just paper, offers plenty of ideas for adult refinement, such as using it to share things or as a container for small items! Master useful origami in this 6-session program.
SHARE


Related article

Crafty Interior Greenery / Yukinko's Free-Spirited and Easygoing Handmade Life
クチュリエの種

Travel x Handmade / Beloved Handmade
クチュリエの種

It's a waste to throw it away! How to repurpose luggage handles into a trunk-shaped document case.
Paper craft

How to make beautiful patterns just by cutting!
Paper craft

Handmade Cards / Yukinko's Free and Easy Life Handmade
Paper craft

The world of collage that paper lovers will fall in love with / Beloved handmade
Paper craft
Articles I recently read

If you feel like doing some handicrafts (handmade crafts),
To the Couturier Shop

Shopping
Once you get hooked, you'll be completely engrossed!
These kits are long-selling and popular items at Couturier. From knitting and joining pieces to creating and wearing them, and enjoying various arrangements, there's a wide selection of kits that will have you completely hooked.
Shopping
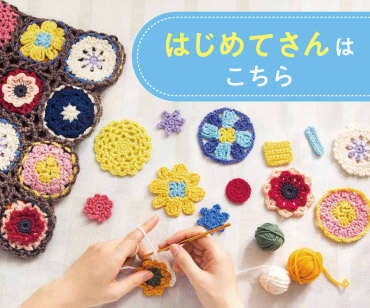
For those new to handmade crafts, click here.
We want many people to experience the joy of making things by hand. That's why we have a wide selection of beginner-friendly lesson kits in our "Basics for Beginners" series.
Shopping
お す す め コ ン テ ン ツ
Shop for craft and DIY kits and handmade goods here.
Shopping
編み物
I want to knit every day, I want to knit all year round.
Shopping
The sun
You're sure to find an embroidery design you want to try!

Shopping
Sashiko
Sashiko embroidery, popular for its traditional patterns and characters.
Shopping
Sewing
A collection of tips and solutions for sewing and sewing problems.
Shopping
Accessories
Handmade accessories
Shopping
Craft
Crafts, handcrafts that don't require needles and thread
Shopping
ミ ニ チ ュ ア
Small, cute, heart-fluttering miniatures
Shopping
Beginner kit
Learn to do it! Popular beginner kit

Shopping
Couturier Shop Site
Shopping
Sales campaign
Shopping
Beginner Knitting Lesson Kit

Shopping