
It's a waste to throw them away! Make a retro-style light using glass bottles.
- Events/planning
- Craft
- Craft artist
- ミ ニ チ ュ ア
- Remake recipes
- Race Blade
- Fabrics, materials, ingredients
- ornaments
- Reading
- Date created:
- Update date:
Kumiko Abe's Remake Recipes
"I might use it someday..." Empty boxes and cans that are still stored away. Things you just can't bring yourself to throw away.
Everyday materials are beautifully transformed with Kumiko Abe's remaking ideas.

Retro-style light made from a glass bottle
Small glass jars that originally contained souvenirs like jam or pudding are sometimes too small to reuse as storage containers. In such cases, why not repurpose them into decorative items? Even if you change the shape of the jar, the overall style will remain the same, resulting in a neat and cohesive look.

★Things you'll need★
- Glass bottle (with a base diameter of about 5 cm and an opening of 4-5 cm)
- Lids for cylindrical cardboard packaging such as potato chips
- The core of masking tape
• Wire (2.5mm thickness)
- Black cardboard
• Decorative materials such as lace stickers and rhinestones
★How to make it★

① Paint the bottle cap, the lid of the cardboard tube packaging for the cylindrical candy, and the core of the masking tape roll with black acrylic paint. Make two holes in the lid of the cardboard tube packaging for threading the wire through.

② Using the full-size design as a reference, bend the wire and insert it into the lid of the cardboard tube package. Secure it from the back with a glue gun.

③ Decorate the glass bottle by attaching lace stickers or similar. When applying wide stickers to curved surfaces, it's a good idea to make cuts in them or apply them in small sections.

④ Place the bottle cap on the base and glue it in place, then set the umbrella (made from cardboard and a masking tape core) and the glass bottle. Add rhinestones or other stickers as desired, and you're done.
*The bottle and shade are detachable. For safety reasons, please do not hang the finished lamp; instead, place it on a flat surface to enjoy it.

★Tips for making it★
Here's a tip for aligning the heights on both sides when inserting the wire into the base.
By securing the position with a clip like this, it won't shift when you secure it from the back.
The retro-style light is complete.

Adding an LED light inside will enhance the atmosphere!

Instagram: @kumideek2

The products featured in this article are listed here.

[¥100 per month] Join the "Couturier Club"!
Join the "Couturier Club" and enjoy tons of great member benefits for just 100 yen a month! Enjoy introductory prices on your first purchase, and our monthly newsletter, "Couturier's Seeds," is packed with fun and useful information, including seasonal crafting ideas, original works by artists, and crafting techniques. We look forward to you joining the "Couturier Club" and enjoying crafting together!
SHARE


Related article

It's a waste to throw it away! How to repurpose a wooden noodle box into a wall hanging panel.
Paper craft

Complete breakdown! ROY (Roy) / A miniature representation of a Parisian chocolate shop.
ミ ニ チ ュ ア

It's a waste to throw them away! How to make candle holders by repurposing plastic bottle caps, wine corks, and milk cartons.
ミ ニ チ ュ ア

The Joy of Miniature Crafts: Appreciating Tiny, Tiny Worlds ~Part 1~
ミ ニ チ ュ ア

It's a waste to throw it away! How to repurpose lactic acid drink containers into a cupcake stand.
ミ ニ チ ュ ア

It's a waste to throw it away! How to make a pendant from a mini sketchbook.
ミ ニ チ ュ ア
Articles I recently read

If you feel like doing some handicrafts (handmade crafts),
To the Couturier Shop

Shopping
"Knitting Festa 2026" will be held!
Couturier's "Knitting Festa 2026" has begun! The ever-popular "Knitting CAL" is also available in new designs! Let's all enjoy knitting!
Shopping
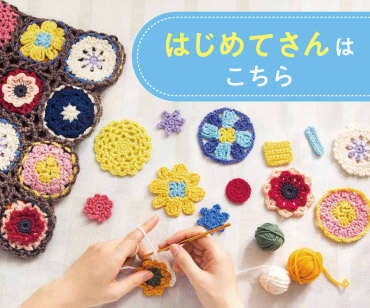
For those new to handmade crafts, click here.
We want many people to experience the joy of making things by hand. That's why we have a wide selection of beginner-friendly lesson kits in our "Basics for Beginners" series.
Shopping
お す す め コ ン テ ン ツ
Shop for craft and DIY kits and handmade goods here.
Shopping
編み物
I want to knit every day, I want to knit all year round.
Shopping
The sun
You're sure to find an embroidery design you want to try!

Shopping
Sashiko
Sashiko embroidery, popular for its traditional patterns and characters.
Shopping
Sewing
A collection of tips and solutions for sewing and sewing problems.
Shopping
Accessories
Handmade accessories
Shopping
Craft
Crafts, handcrafts that don't require needles and thread
Shopping
ミ ニ チ ュ ア
Small, cute, heart-fluttering miniatures
Shopping
Beginner kit
Learn to do it! Popular beginner kit

Shopping
Couturier Shop Site
Shopping
Sales campaign
Shopping