
Mindlessly and quickly, I finished it! The story of how I made a one-of-a-kind needle-felted rabbit.
- Date created:
- Update date:

This kit caught my eye even before its release, and I was instantly excited, thinking, "I want to make this too!"
The hashtags #wool felting failure that I see on social media come to mind...
In conclusion, I managed to complete one rabbit!

The one on the left is the artist's example, and the one on the right is the one I made. It has a little bit of individuality and charm, but I find that endearing. Even someone as clumsy as me was able to make this adorable, fluffy animal needle felting kit. I'll share the secrets to its cuteness and ease of use in this report!
 ̄ ̄ ̄ ̄ ̄ ̄ ̄ ̄ ̄ ̄ ̄ ̄ ̄ ̄ ̄ ̄ ̄ ̄ ̄ ̄ ̄ ̄ ̄
Here's the kit I made this time!
⇒A group of adorable and endearing fluffy animals from the north, made from wool felt.
\Even easier! For absolute beginners, start here/
⇒It's as if you can hear a story unfolding! Needle felt animals: "The Basics for Beginners"
_______________________
Table of contents
 ̄ ̄ ̄ ̄
What will be included in the delivery?
Let's make a rabbit!!!
・Finished
I want to see the individuality of each creator side by side!

① What will be included in the delivery?

I received a set of materials in individual packets, a postcard with a finished sample, and instructions on how to make it.
They send one at a time from a selection of six, and this time it seems to be an Ezo hare.
My senior colleagues in product planning told me that it's a good idea to have a needle with a handle (essential) and spare needles, so I ordered them along with the kit! (After actually making it, there were definitely times when I was glad I had spare needles!)
*The needle with a handle and replacement needles shown on the right in the photo are not included in the kit.

Take out the contents and arrange them, then divide the wool and stuffing into the required amounts for each part. The helpful instructions even explain how to cut the stuffing, which is reassuring.

We'll start by inserting the cotton that will form the base of the body!

It was quite a large lump, so I thought, "Is this going to be the size of that rabbit...? How far do I need to stab it...???" But I knew I wouldn't know unless I tried, so I picked up the needle.
② Let's make a rabbit!!!
I just keep poking it. Will it really turn into a rabbit? How many times will I have to prick my finger...? When I was in elementary and middle school, people around me used to say I was "skillful," but before I knew it, people started saying I was "clumsy," so I'm a little nervous to start this.

It's hardened quite a bit, so I think it's almost done?

I thought so, but when I compared it to the actual-sized drawing, it was still too big.

I continued stabbing until I created a recess for attaching the head.
I pierced and hardened the head in the same way.
Attach the finished head and body


Attach wool to the face and body, and when you're finished, make the nose.

I even added some cute, round eyes.

It's supposed to be a rabbit, but somehow it looks a little like a seal...?
It's been six and a half hours of work so far. It's amazing to see it gradually take shape in the palm of my hand.
When I first tried to make the eyes, I wasn't quite happy with the face, so I kept poking it until it hardened and the needle broke! I was so glad I had a replacement needle ready! However, it took a long time to process, and I was kind of shocked by the needles stuck in its face, so I forgot to take pictures. I'm sorry.

After that, I added the ears, paws, and tail, and the whole process took about 10 hours!
That said, I was stabbing while talking on the phone with friends or mindlessly stabbing while listening to music, so I didn't even notice the time passing. When I was stabbing silently by myself, it felt almost like I was meditating, and it was a time when I could confront the part of myself that I had been neglecting because I was so busy.
③ It's finished.

Since it was my first time doing needle felting, I was worried for a while about what I would do if I ended up with a nightmare-like rabbit, but I managed to create a cute and fluffy little bunny that I can really cherish.
My seniors and classmates all told me, "You look like Y-chan!" Now that they mention it, I do think I do have a relaxed face, kind of like me, the creator.
I was able to create a rabbit, even though I started with a seal, thanks to the detailed instructions.

There are life-sized diagrams throughout, and even photos that indicate how much to poke until it reaches a certain shape, so I was able to avoid common problems with needle felting, such as "poking too much and making it rock hard" or "not poking enough and making it soft and fluffy"!
I think this is a common thing for beginners, but when I got to making the face, I got this inexplicable surge of confidence and ended up going a little overboard with my design. That's probably why it ended up looking like a seal...but it still turned out to be a rabbit, so I was grateful for the detailed recipe.
By the way, regarding the injury I was worried about, wondering "how many times will I prick my finger...", I did prick my finger about 10 times while it was being made, but thankfully there was no bleeding and I was fine!
However, be careful when making them, as small parts like ears and limbs can easily cause you to accidentally prick your fingers.
④ Everyone is different, and that's okay!
Since the finished product is supposed to resemble the creator, I was curious to see "how much individuality would come through," so I borrowed works from artists and testers to fulfill my long-held wish!

(Boom!)
Not only the face, but the hands, feet, and body all come together to show individuality!!! My senior in product planning taught me that "the finished product will resemble the person who made it a little." The rabbit I made is the second one from the right, and the one on the far right was made by the teacher who supervised the kit.
Even when lined up like this, they all look just like rabbits and are so cute!
Thanks to the complete set of materials and detailed instructions, reproducibility is guaranteed, so even those trying needle felting for the first time can confidently give it a go.


She was the epitome of cuteness from every angle, not just her face, so I decided to include her butt as well.
With its plump, round, and adorable bottom resembling a daifuku (rice cake), it's simply endearing to look at.

I want you to see the cute soles of its feet as it lies on its back. Don't you think its feet remind you of a slightly milky, gentle taste, like baby biscuits? I sometimes find myself flipping it over to take a look.
As I mindlessly stitched and shaped the animal, I felt a sense of calm and introspection. It would also be fun to make one with friends or family and then line up the finished creations. I would love to see the animals created by my close friends or my favorite characters.
Needle felting is an easy way to start for those who "didn't like home economics in school" or "want to try a new hobby of handmade crafts, but find embroidery or knitting too difficult." Even if you're worried about uneven stitches or knitting, needle felting is a fun and relaxed way to enjoy it, as imperfections can become part of its unique character and charm.

This article features a rabbit, but kits for other fluffy animals are also available!
Needle felting is something you can enjoy alone or with others, so please give it a try!
The products featured in this article are listed here.

A group of adorable and endearing fluffy animals from the north, made from wool felt.
This fun wool felt kit lets you freely shape six different kinds of tiny, fluffy animals that bravely survive the cold in the northern lands, by quickly and easily poking them with needle felt.

It's as if you can hear a story unfolding! Needle felt animals: "The Basics for Beginners"
For absolute beginners, we also recommend this! A lesson kit for first-timers that lets you learn the basics little by little.
SHARE


Related article

Mindlessly and quickly, I finished it! The story of how I made a one-of-a-kind needle-felted rabbit.
Felt craft

How to Make Felt Sweets Motifs ~Including Tips for Marking and Cutting Felt~
Felt craft

Collaboration with Felissimo Cat Club ♪ Popular "Needle Felted Kitty"
Felt craft

[Video Tutorial] How to Make a Felted Wool Item! Cute Animals for Coin Purses♪
Felt craft

[Free Pattern Available] How to Make and Sew Felt Mascots
Felt craft

Handmade, a time for playtime just for myself / Beloved handmade items
編み物
Articles I recently read

If you feel like doing some handicrafts (handmade crafts),
To the Couturier Shop

Shopping
Once you get hooked, you'll be completely engrossed!
These kits are long-selling and popular items at Couturier. From knitting and joining pieces to creating and wearing them, and enjoying various arrangements, there's a wide selection of kits that will have you completely hooked.
Shopping
For those new to handmade crafts, click here.
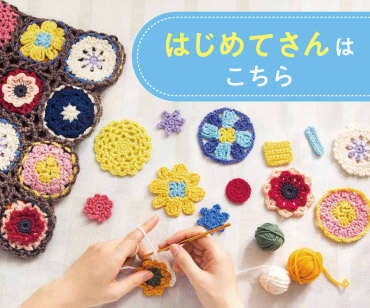
We want many people to experience the joy of making things by hand. That's why we have a wide selection of beginner-friendly lesson kits in our "Basics for Beginners" series.
Shopping
お す す め コ ン テ ン ツ
Shop for craft and DIY kits and handmade goods here.
Shopping
編み物
I want to knit every day, I want to knit all year round.
Shopping
The sun
You're sure to find an embroidery design you want to try!

Shopping
Sashiko
Sashiko embroidery, popular for its traditional patterns and characters.
Shopping
Sewing
A collection of tips and solutions for sewing and sewing problems.
Shopping
Accessories
Handmade accessories
Shopping
Craft
Crafts, handcrafts that don't require needles and thread
Shopping
ミ ニ チ ュ ア
Small, cute, heart-fluttering miniatures
Shopping
Beginner kit
Learn to do it! Popular beginner kit

Shopping
Couturier Shop Site
Shopping
Sales campaign
Shopping
Beginner Knitting Lesson Kit

Shopping